As the COVID-19 pandemic has continued along its way through the world, our community has responded as it always does, by designing and making things intended to solve the problems thrown up by the situation we find ourselves in. Much of this effort has gone into the production of PPE to plug the gap and many essential staff have been protected by maker-provided equipment, while the remainder of the effort has produced a wide array of clever designs for COVID-related items.
With curves flattened in many areas, Governments around the world are now encouraging the wearing of face masks in everyday social interactions. The purpose of mask for the general public is for droplet catching rather than virus filtering, and home made masks easily accomplish this. So let’s take a look at what you need to know about making a mast of your very own.
Now Is The Time To Talk About Making PPE
In the first part of this series I took an overview of how the requirements for a general public mask are different to those of a mask for medical staff, and examined a few commercially-available options. We will now examine together the materials and construction of home-made masks.
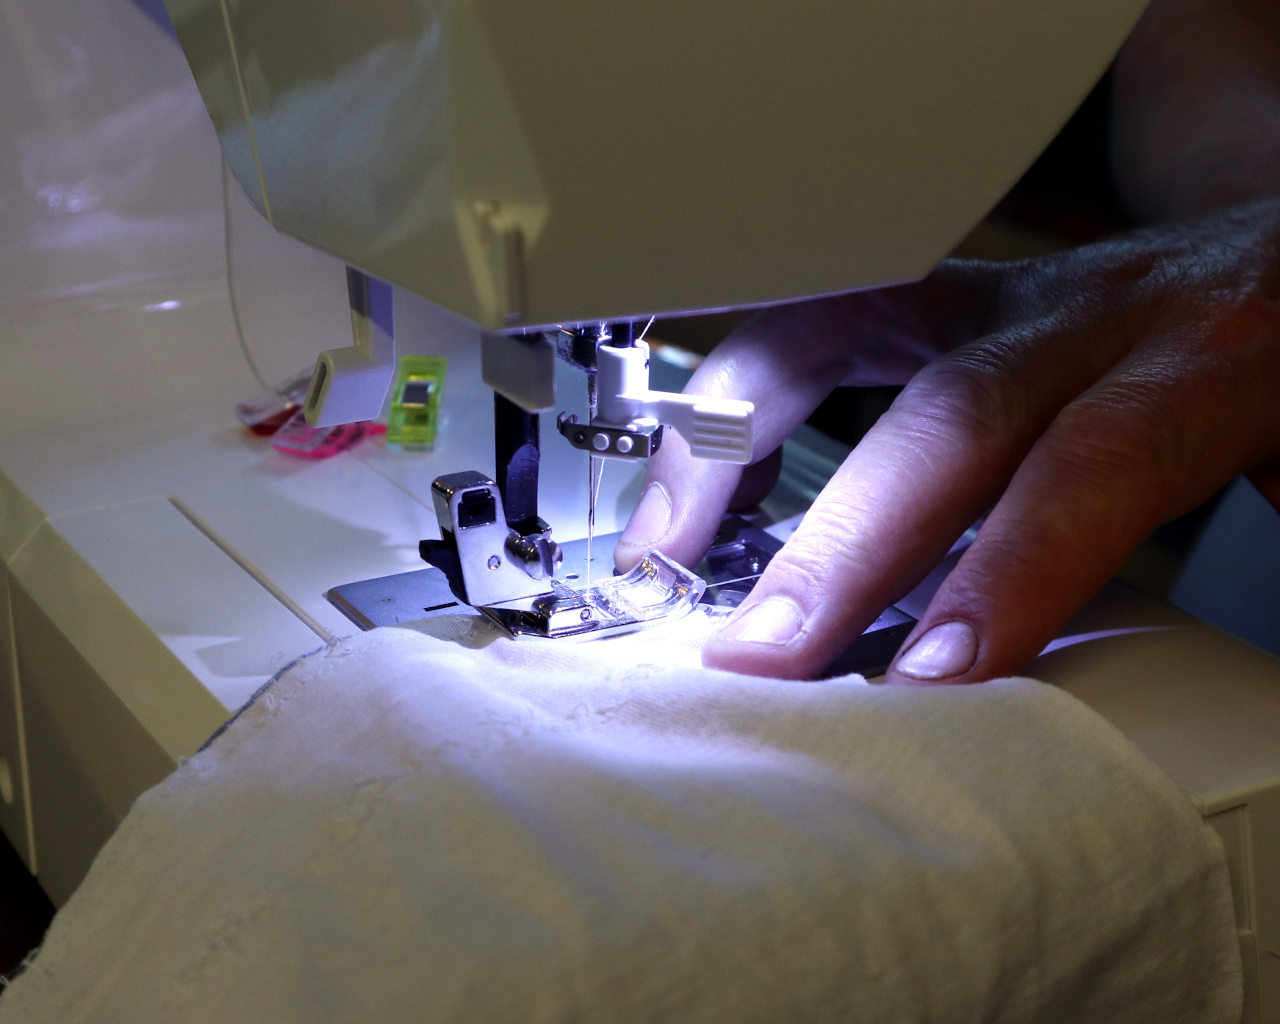
In the past I’ve looked at sewing machines and the textilist’s bench in detail, but for mask making you should be good to go with almost any sewing machine, a sharp pair of fabric shears, and maybe some pins to make your life easier. I want our community to come through all this in good shape, so I invite you to join me at the sewing machine. You could make a Government-sanctioned simple no-sew variety, but for use over the coming months there’s no substitute for a sew mask.
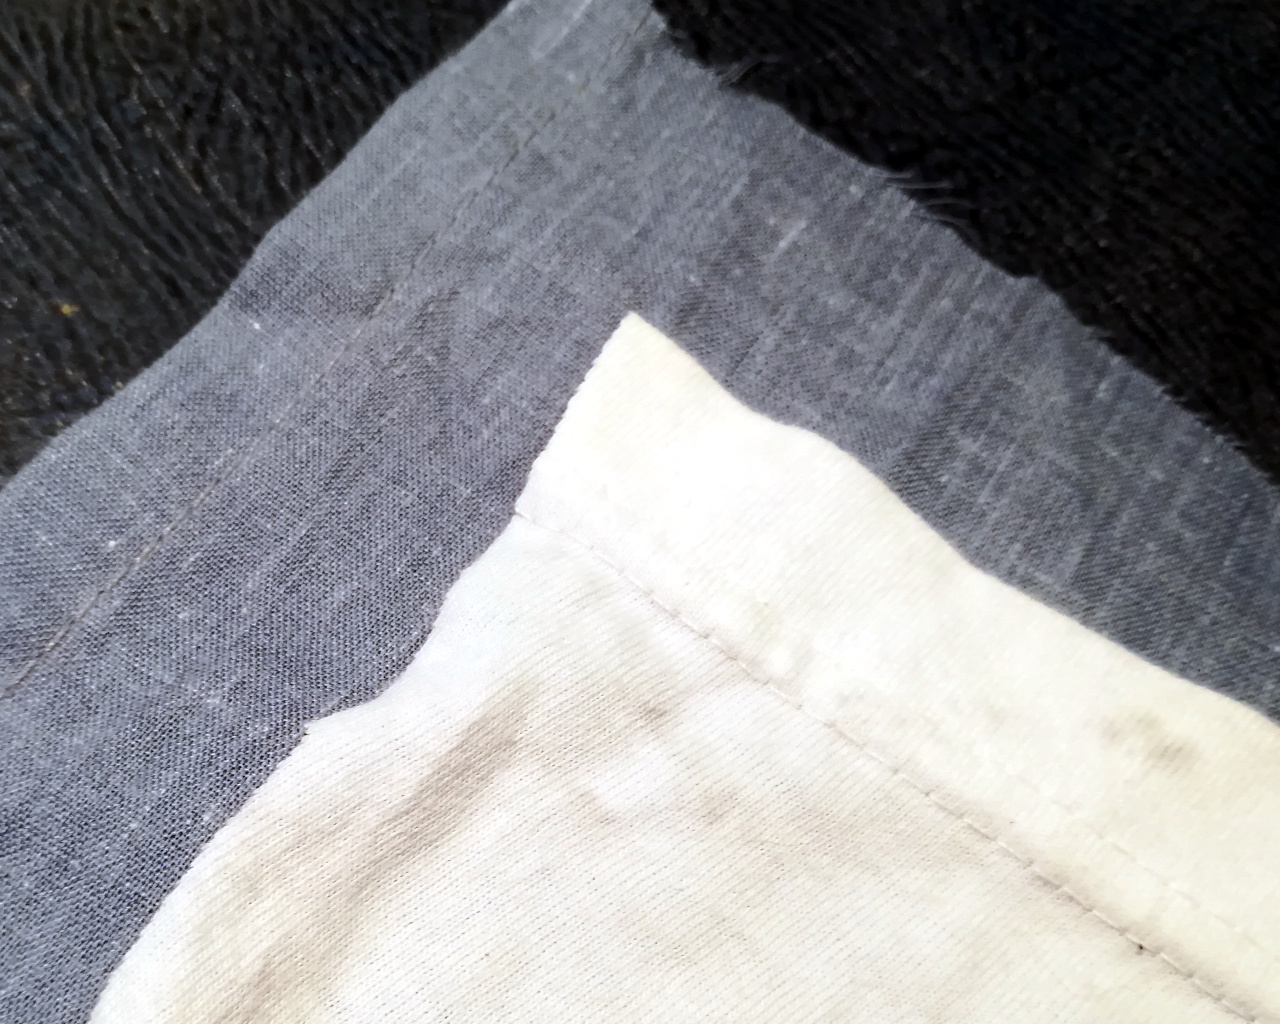
Before anything else when considering a mask, we must start with the choice of fabric. It is important that whatever layers your mask contains must be both effective filters and be safe to breathe through. Whatever air passes through it will end up in your lungs, so as you can probably imagine there will be unsuitable materials that can give you significant problems. In particular some non-woven cloths are not designed as filters and will shed fibres, and some materials may contain mineral or harmful chemical components. A commonly touted idea for example is that a vacuum cleaner bag makes a suitable material based upon its filtering ability, however since there are vacuum cleaner bags whose paper contains fungicide as well as other harmful substances it would be difficult to ascertain whether your bag is safe to breathe through. We covered some research back in March that looked at the effectiveness of a variety of materials, and for the purposes of this article we’ll be going with their conclusion of a two-layer design featuring cotton-T-shirt fabric and cotton bed linen.
Making The Many Masks
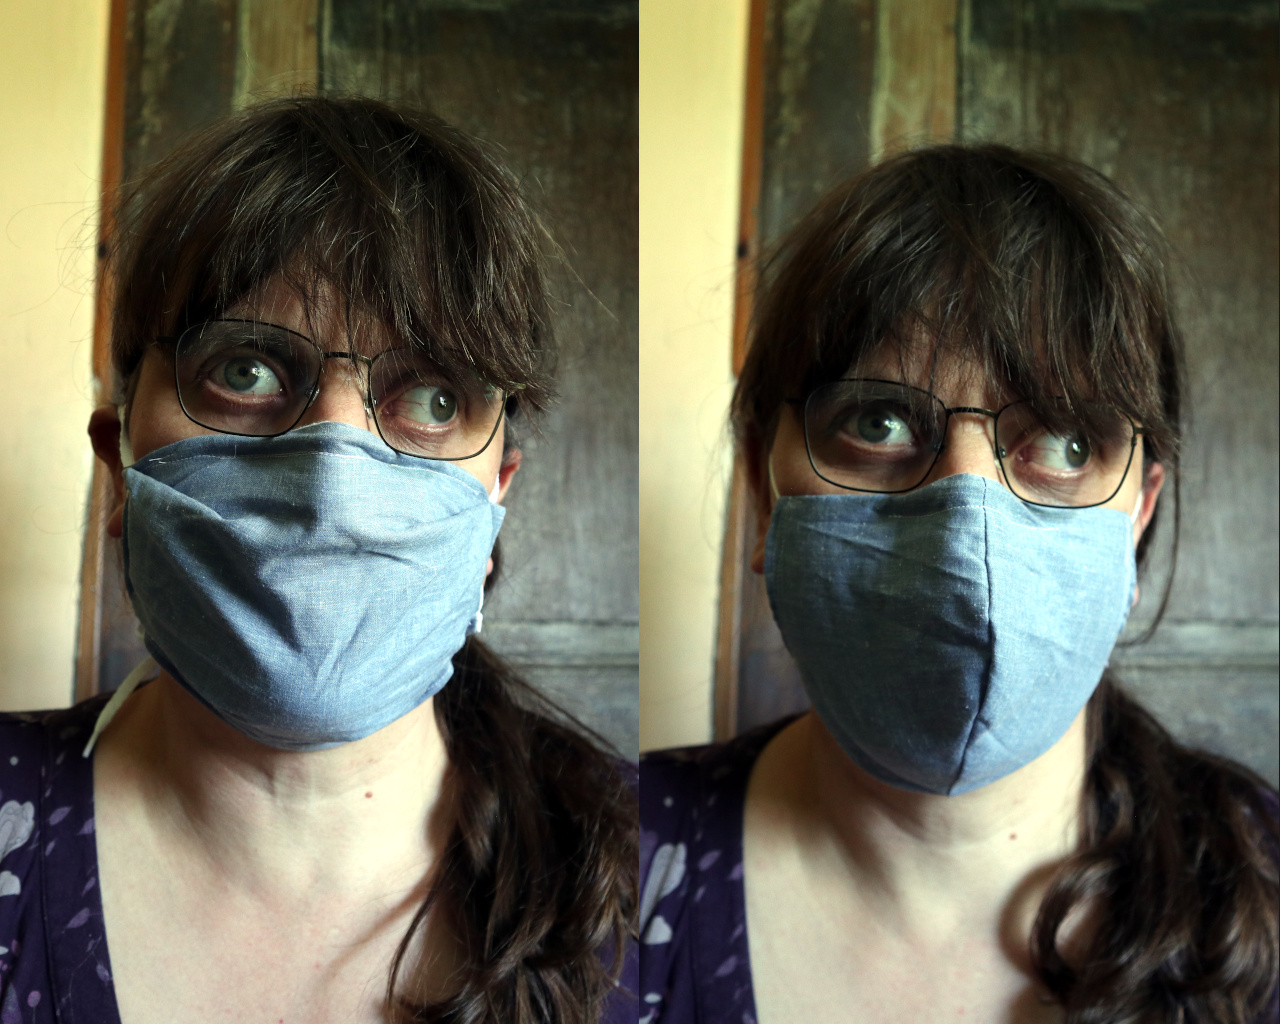
There are a variety of mask designs to be found, but they all fall into two broad streams of pleated “surgical” style or a more fitted style with a seam down the middle. The style you pick is a matter of personal preference.
Of the two I found the pleated design to be easier to make but less stylish, and the fitted style to be difficult to get right but worth persevering — once you nail the dimensions you can made several to have on hand.
The patterns I used were the HK Mask which was the first fitted mask I tried, Tanya Fish’s pattern with instructions, and a pattern for a pleated mask from SleepPhones to which I have made a few modifications.
Pattern Behavior
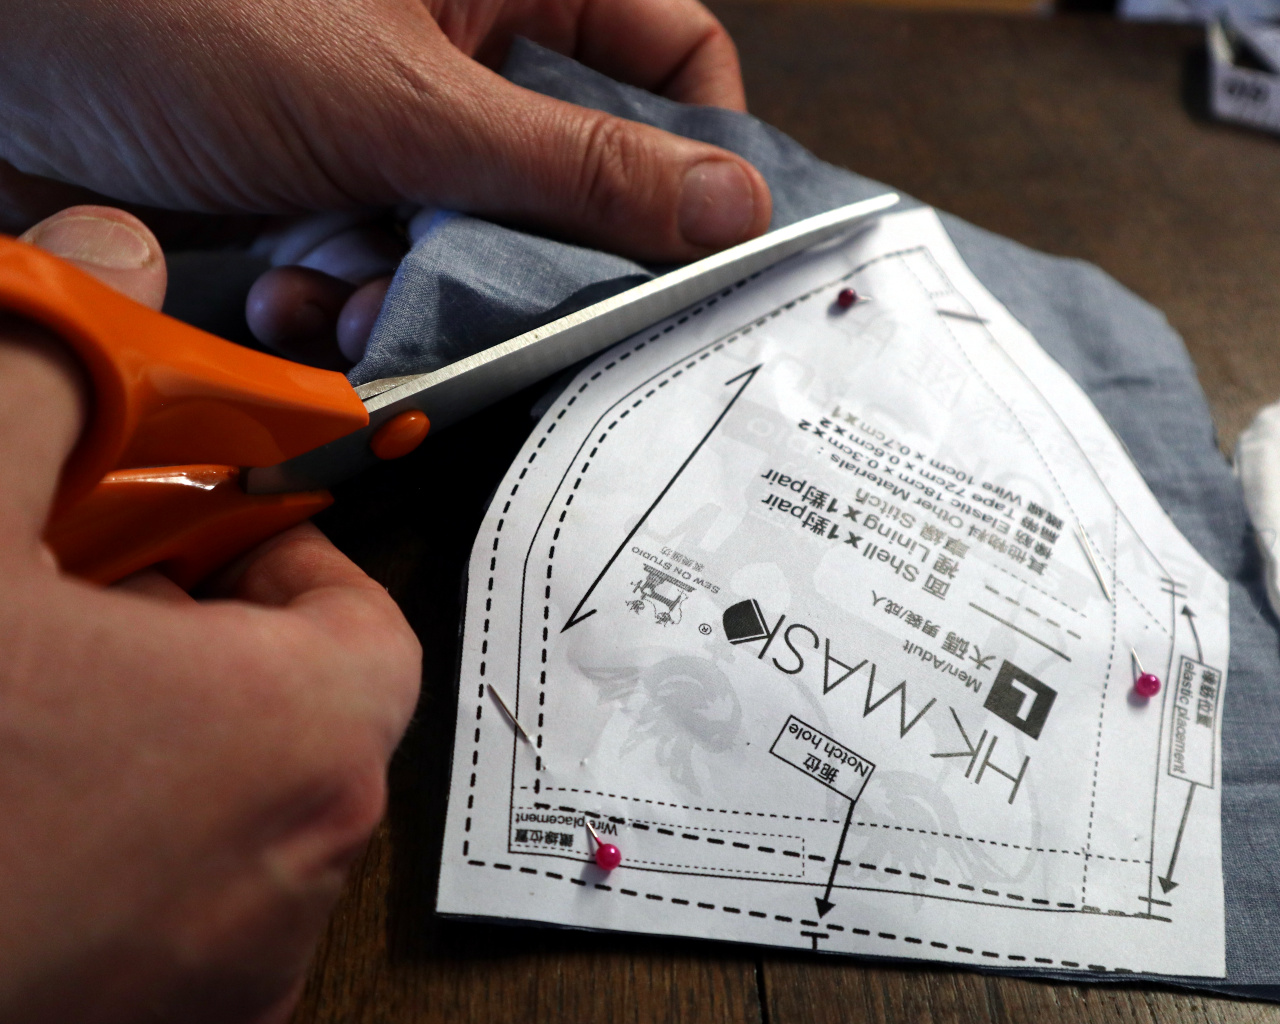
The first step is printing out the pattern to size and pinning it to your material. For the fitted mask you then sew together the two pattern pieces for each layer, with the pleated mask you simply cut out a rectangle of material. From there, sew the layers together as an inside-out bag along three seams integrating whatever nose stiffener you are using into the top seam.
Making The Turn and Securing the Straps

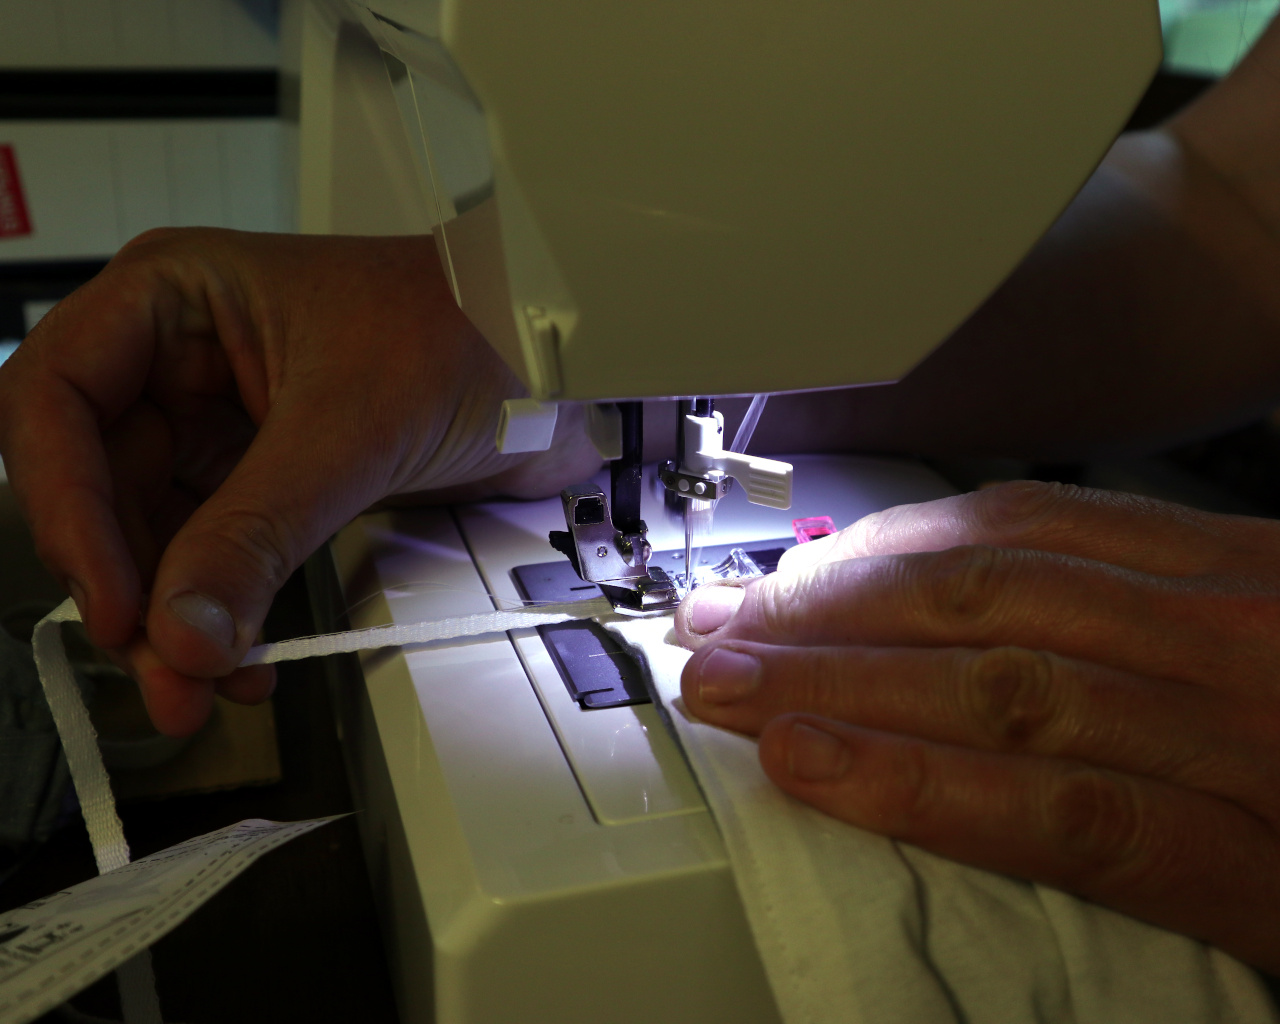
We left the fourth edge open so that you can turn the bag the right way out. The remaining seam can now be top-stitched. It’s best to follow the instructions with whatever design you choose, but once you have made more than a couple you’ll get the feel for it and be able to modify the pattern as you see fit.
On commercial masks the ties are universally elastic, and hook over the ears or round the head. At times during the pandemic there has been a shortage of elastic, so in its place I have used trainer laces. You can also try making your own bias tape with a 3D-pinted folding device and your sewing machine, or saving the elastic from disposable masks if you have any. The elastic can be incorporated into the side seams as you sew them, or in the case of trainer laces their half-way point can be laid over the centre of the side seam or pleated area and they can be sewn onto the surface of the fabric.
Fitting Around Your Nose and Adding Some Style to Your Mask
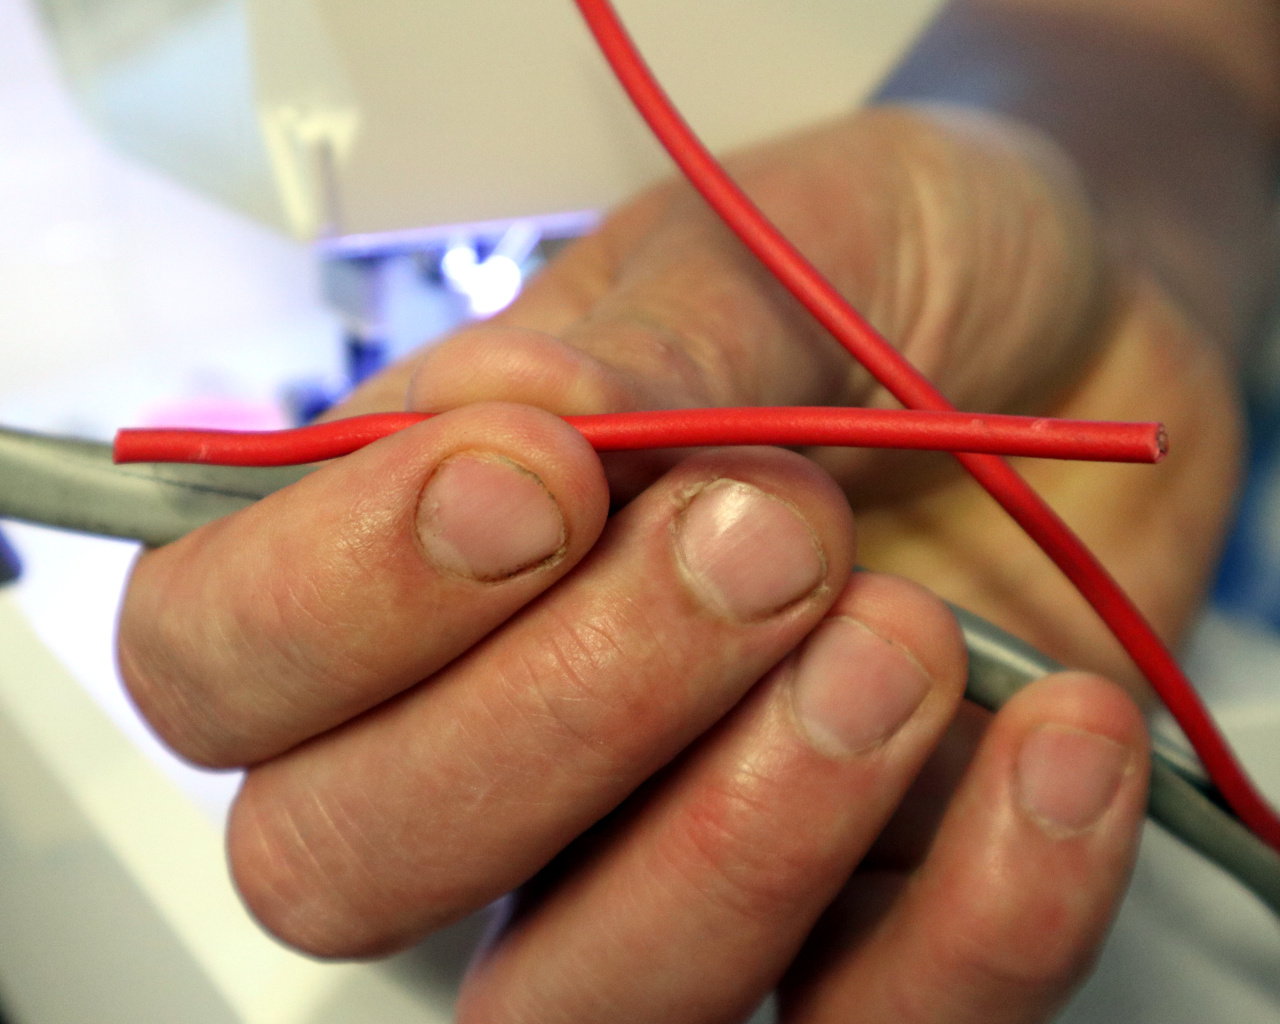
The nose wire can be almost anything stiff but flexible enough to bend, that will survive being washed. Pipe cleaners and gardening wire have been used, I tried a cable tie which wasn’t stiff enough, in the end I settled for a single insulated copper conductor from UK house wiring cable. I suggest you try a few for ease of bending before you commit to one.
These masks aren’t sterile medical devices, but they should be cleaned regularly. There must be any number of ways to sterilise them, but I am not going quite that far. Instead, since the advice is that the COVID-19 virus has a shell that is susceptible to soaps, I am washing my masks in the washing machine with the rest of my laundry.
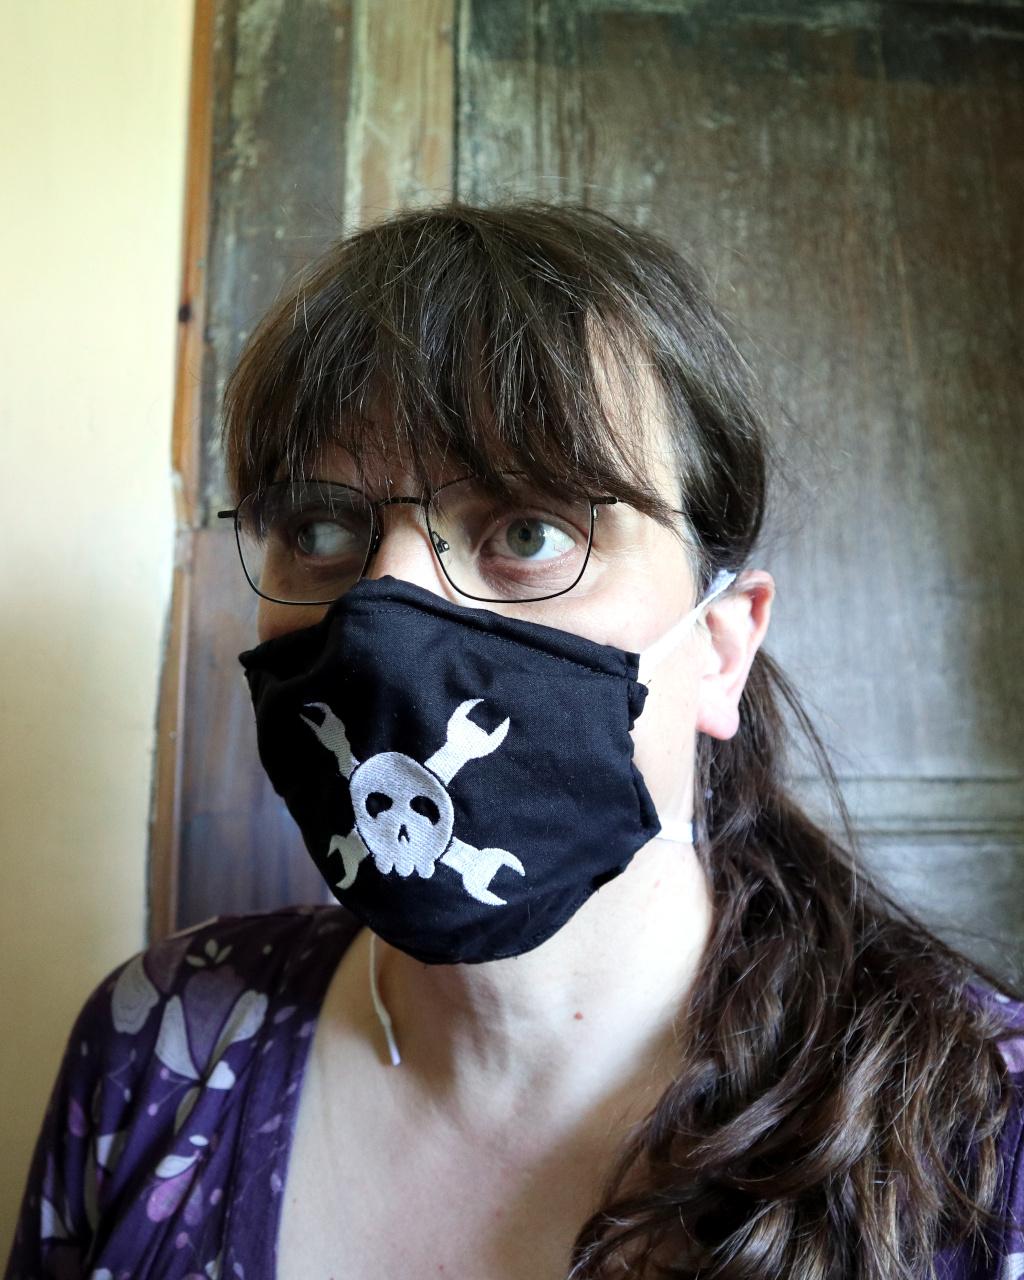
Finally, with the pleated masks there are two ways that they can be folded. The first is as a series of short panels folded in one direction, but there is another one using a box pleat, a larger flat area with smaller pleats in opposing directions. It makes little difference to the wearer, but the latter style makes for better display of any logo or pattern on the fabric.
In particular last October at the eth0 event in the Netherlands I was lucky enough to have a friend use a Brother embroidery machine to put a Wrencher on a piece of linen dress fabric. It’s sat in my textile box ever since, and a Wrencher mask with the logo arranged at the centre of the box pleat is the perfect use for it. I’m sorry that it’s a one-off, but perhaps it will give you ideas should you know anyone with a similar embroidery machine.
I hope that the two parts so far of this series have filled any gaps in your knowledge about face masks, and have equipped you with everything you need to set about making your own. There’s one further part to come in this series on surviving the pandemic as a hacker, and this time it’s not to do with the virus itself. The lockdown and quarantine is a once-in-a-lifetime upheaval for most of us, and that will have an effect on people in itself. We’ll be looking at the mental health aspects of surviving it, and how to come out the other side with as few scars as possible.
No comments:
Post a Comment