SLA printing in resin is great, but part washing can be a hassle. The best results come from a two-stage wash, but that also means more material and more processing steps. Fortunately, there are ways to make it easier and more effective. One such way is to use a part washing machine, and I’ll cover a DIY option to make your own, but despite what the advertising implies for the commercial ones, a wash machine isn’t a cure-all.
Let’s go through how to get the best results from part washing, how to make the solvent last as long as possible, and how to dispose of the eventual waste.
Resin-Printed Parts Need Washing
All parts printed in resin emerge from the printer coated in syrupy, uncured goop. This needs to be removed completely, or the print ends up sticky and no amount of drying or additional UV curing will change that. (There is a way to fix sticky prints, but it’s better to avoid the situation in the first place.)
Simple part washing can be done with nothing more than a jar in which to rinse and soak a small part for about ten minutes, but agitation and a secondary wash will go a long way toward better and more consistent results. As mentioned, part washing machines like to present themselves as a one-appliance solution, but best results still come from a two-stage wash, and that means some additional steps.
One Wash Good, Two Washes Better
In a single wash, a part gets rinsed in a bath of solvent, usually isopropyl alcohol, and the resin rinsed away by this process ends up in the alcohol. As the concentration of resin in the solvent rises with each successive wash, it gets cloudier. After a while, parts start to come out sticky no matter how long they were rinsed, because they’re never completely clean. This happens for the same reason that one can’t properly clean dishes in dirty water. The solution is to replace the solvent entirely, and begin again.
In a two-stage wash, two separate solvent baths are used — a primary and a secondary — and the part spends an equal amount of time in both. The primary bath removes the bulk of the uncured resin, and then the part is moved directly to a secondary bath for a final rinse, after which it should be nice and clean. Most of the uncured resin ends up in the primary wash, with the remainder coming off in the secondary.
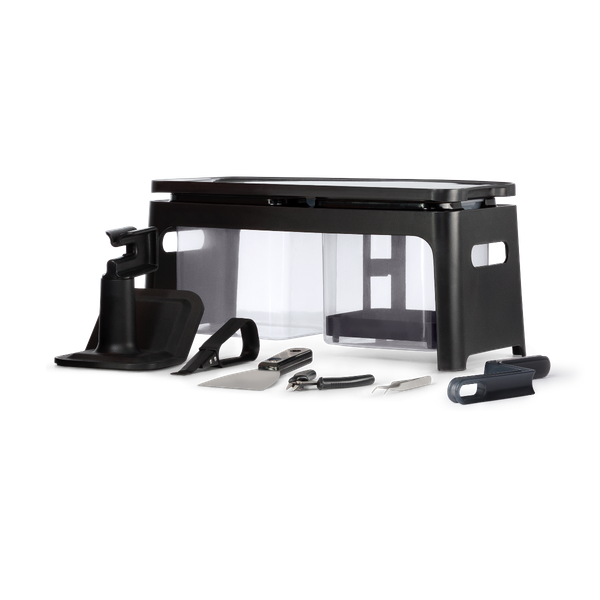
As a result, a given volume of alcohol also lasts longer before it needs to be replaced. The dual-wash process is recommended by Formlabs; their finishing kit, pictured here, provides two containers for exactly this purpose.
A part washer machine, on the other hand, is only a single-stage wash. To perform a two-stage wash, either two machines or an additional manual wash in a separate container of solvent is needed.
Part Washer Options
A part washing machine can be a great quality-of-life improvement because they have handy basins and provide agitation of the solvent to improve results. Making one isn’t too hard, either. Here are a few commercial options available online, followed by a DIY option.
Curing and Washing Machine (CW1) by Prusa
The CW1 is a multipurpose machine that combines washing, drying, and additional UV curing in a single machine. With the wash basin installed, it acts as a part washer. Remove the wash basin, and the UV LEDs mounted on the inside provide post-print curing for any models or resins that require it. This array of features comes at a price, and that price is $699 USD.
Form Wash by Formlabs
The Form Wash currently clocks in at $499 USD and is aimed at day-in-day-out use. It has a large basin that holds around eight liters for automated washing, with smooth integration into Formlabs’ workflow and their line of SLA resin printers. It can, however, be used on its own just fine.
Wash & Cure Machine by Anycubic
Anycubic’s machine offers part washing and curing similar to Prusa’s CW1. With the wash basin installed, it is a part washer. With the basin removed, the UV LEDs perform additional curing. It’s not as refined of a device, but at a regular price of $219 USD, the cost is the lowest option by far.
A single part washer is still only a single-stage wash. For dual washing, the luxury option would be to buy two part washers, but it’s also an option to make your own.
A DIY Part Washer
The DIY route is simple, and centers around using a cheap magnetic stirrer from Amazon or your favorite overseas seller.
Choose a clear container for the solvent that can seal completely and will fit your largest prints. Clear is important, because it is of great practical use to be able to see inside the container. Fill it with solvent, sit it on top of the magnetic stirrer, and drop in the stir bar. Turn on the stirrer, and the stir bar will spin and agitate the solvent.
However, the spinning stir bar will smack into anything placed into the alcohol with it. To prevent this, an object resembling a grid or coarse mesh will act as a standoff, preventing objects from falling through and touching the stir bar. This part can easily be 3D printed in any filament that doesn’t mind being submerged in alcohol, like PLA for example.
My 3D-printable design for a standoff grill is available here and it can be easily resized to accommodate different containers. This allows container size to be arbitrary; visit the dollar store and choose whatever container is convenient, and print a standoff grill to fit. The only downside is that very small parts may fall through the holes, so for them it is best to suspend them it in the bath with a thin wire.
With this DIY design, two-stage part washing is simple: just buy an additional container, add a stir bar and 3D-printed standoff grill, and label one as primary and the other as secondary. There is no need to remove the grill or stir bar between washes. For storage, just seal the container.
Making The Solvent Last Even Longer
The primary wash liquid will get dirty and cloudy much faster than the secondary. This can be compensated for to some extent by an increased wash time, but eventually it will be necessary to change it out. When that happens, set the container aside and let it settle for a week, then pour off the (mostly clear) portion on top for re-use in another primary wash. Pour the cloudy lower portion into a clearly labeled container for eventual disposal.
The secondary wash will stay clean longer, but eventually it too will get dirty and need to be swapped out. When this happens, break out some fresh new alcohol for a new secondary wash. As for the old secondary liquid, just re-label it as a new primary wash. It might be too contaminated to use for finishing, but it’s still plenty good for primary washing.
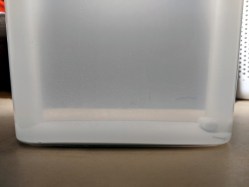
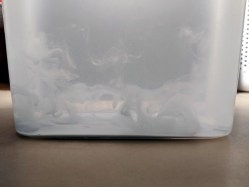
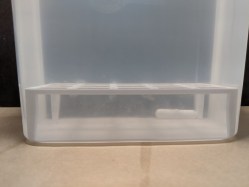
Here is a visual example of how much heavier contamination can be in the primary versus the secondary wash. (These basins were used to clean parts printed in a grey resin, and the grill has been removed from the primary, but the stir bar left behind.)
With a two-stage wash that reclaims alcohol by pouring off the primary after it settles, a given volume of solvent lasts even longer.
Disposal
Nobody likes to talk about it, but sooner or later the “for disposal” container will get too full.
If there is a local option for disposing of hazardous waste, the hands-off option is to label it as isopropyl alcohol that contains photopolymer resin (i.e. it has some plastic dissolved in it) and let the experts take care of it. To dispose of smaller amounts, pour into a disposable tray and leave it outdoors in sunlight. The alcohol will evaporate away and the resin left behind will eventually cure into a filmy, brittle mass that can be disposed of like any other plastic garbage.
Resin printing is great but requires added work and post-processing, so be sure to get the most from it by using a dual wash and making sure the solvent gets used as efficiently as possible. Do you have your own tips for better washing or easier post-processing? We want to hear it, so let us know in the comments.
No comments:
Post a Comment