Tuesday, April 30
Camera Sees Electromagnetic Interference Using an SDR and Machine Vision
It’s one thing to know that your device is leaking electromagnetic interference (EMI), but if you really want to solve the problem, it might be helpful to know where the emissions are coming from. This heat-mapping EMI probe will answer that question, with style. It uses a webcam to record an EMI probe and the overlay a heat map of the interference on the image itself.
Regular readers will note that the hardware end of [Charles Grassin]’s EMI mapper bears a strong resemblance to the EMC probe made from semi-rigid coax we featured recently. Built as a cheap DIY substitute for an expensive off-the-shelf probe set for electromagnetic testing, the probe was super simple: just a semi-rigid coax jumper with one SMA plug lopped off and the raw end looped back and soldered. Connected to an SDR dongle, the probe proved useful for tracking down noisy circuits.
[Charles]’ project takes that a step further by adding a camera that looks down upon the device under test. OpenCV is used to track the probe, which is moved over the DUT manually with the help of an augmented reality display that helps track coverage, with a Python script recording its position and the RF power measurements. The video below shows the capture process and what the data looks like when reassembled as an overlay on top of the device.
Even if EMC testing isn’t your thing, this one seems like a lot of fun for the curious. [Charles] has kindly made the sources available on GitHub, so this is a great project to just knock out quickly and start mapping.
[via RTL-SDR.com]
A Stylish Low Part Count Non-Contact Thermometer
A non-contact thermometer is a pretty common tool anymore, and one that most of us probably have kicking around the lab. You can grab them online for as little as $10 USD, and while they’re nowhere near as capable as a thermal camera, they certainly have their uses. But even with their increased availability, there are at least two safe assumptions we can make about owners of said gadgets: they didn’t make it themselves, and they are probably pretty ambivalent about its aesthetics.
 Which makes this project by [Ijon Tichy] particularly interesting. Not only is this a non-contact infrared thermometer that’s extremely easy to build should you be so inclined, but it’s actually quite attractive. In fact, if it wasn’t for the video of it in operation after the break, we would have assumed it was some kind of faux-retro cosplay prop. Even if you don’t have any use for an IR thermometer, you might just want to add one of these to your toolbox on principle.
The main components of the thermometer are a MLX90614 sensor, a gorgeous HP QDSP-6040 bubble display, and a ATtiny2313 microcontroller to tie it all together. The rest are passive components, with the exception of the TP4056 charging module that got tacked on to handle the 200 mAh lithium-ion battery. All of the components are arranged neatly in a line down the length of the thermometer, which is assembled on a piece of perfboard. Rather than go with a 3D printed enclosure that would cover it all up, [Ijon] decided to encapsulate everything in a clear epoxy resin. It looks fantastic, though you’re going to want to triple check all those solder joints before pouring on your “enclosure”.
[Ijon] has provided the diagrams and source code you need to build your own version of this artisanal thermometer, but we think with a custom PCB and perhaps a less liquid enclosure that still shows off the goods, this could be a very popular gadget for the discerning hacker. As we’ve seen, even the most basic of tools can benefit from a stylish makeover.


A post-action analysis of GoT’s Battle of Winterfell—through a glass, darkly
-

It's Team Human, led by Jon "Oh, geez, this isn't going well" Snow... [credit: HBO ]
Halfway through the last season of Game of Thrones, we put together an after-action analysis of the major military engagements driving the plot of the series in the season's two central episodes—"The Queen's Justice," in which the forces allied against Queen Cersei got seriously pasted, and "The Spoils of War," in which Daenerys Targaryen, her dragons, and her Dothraki rapid response force swept down on the Lannister army's wagon train and turned it into a macabre cookout.
Now we're halfway through the final season of the series, and we're at a similar pivot point. The second episode of the season—"A Knight of the Seven Kingdoms"—laid out the somewhat awful strategic position that the combined allied forces under the command of Daenerys Targaryen and her Warden of the North, lover and likely nephew Jon Snow. And in the most recent episode—"The Long Night"—that situation reached its climax and conclusion in what could set the record for the least number of photons registered in a film or video production of its length ever.
As we were writing this, we were beaten to the punch by one of our favorite military Twitterati and bloggers, Angry Staff Officer, a master of fictional tactical interpretation, in his excellent but perhaps slightly misguided analysis for our sister publication, Wired. It's definitely worth reading, and you should do so right after you read this—unless you have not seen the episode and are averse to spoilers. In that case, come back and read both once you're ready.
Read 18 remaining paragraphs | Comments


Google admits Pixel 3 sales have fallen year over year
-

The Pixel 3 XL. [credit: Ron Amadeo ]
Alphabet, Google's parent company, had its earnings call yesterday, and, while these calls are primarily about advertising click-through rates and traffic-acquisition costs, yesterday's call actually contained some information about Google's smartphone sales. It turns out sales of the Google Pixel flagship are down year over year, meaning the Pixel 3 is selling worse than the Pixel 2.
Here's the full quote from Alphabet and Google CFO Ruth Porat:
Hardware results reflect lower year-on-year sales of Pixel, reflecting in part heavy promotional activity industry-wide given some of the recent pressures in the premium smartphone market.
"Recent pressures in the premium smartphone market" can mean a lot of things, but basically Google is admitting that there is some tough competition out there for the Pixel 3 and that the phone isn't selling as well as its predecessor. Google doesn't break out "hardware results" in its earnings report, so we can only guess at what the year-over-year difference is. It was bad enough to mention in an earnings call, though.
Read 6 remaining paragraphs | Comments


OpenGL Shaders And An LED Cube
Back in February at the Hacker Hotel camp in the Netherlands, among the many pieces of work around the venue was a rather attractive LED cube. Very pretty, but LED cubes have been done many times before.
If a casual attendee had taken the time to ask though, they might have found something a little more interesting, for while the cube in question might have had the same hardware as the others it certainy didn’t have the same software. [Polyfloyd] had equipped his LED cube with OpenGL shaders to map arbitrary images to the cube’s pixels in 3D space.
Hardware-wise it’s the same collection of AliExpress LED panels and Raspberry Pi driver board that the other cubes use, in this case mounted on a custom laser-cut frame. Driver software comes from an open-source library round which he’s put a wrapper allowing input through a UNIX pipe. This can take the RGB output of an OpenGL shader, of which he has created both 2D to 3D and spherical projection versions. The must-see demo is a global map of light pollution, and the result is a rather impressive piece of work.
If LED cubes are your thing, don’t forget this recent Hackaday Prize entry.
Shaping the Cities of the Future At Maker Faire Vienna
 What does the city of the future look like? That’s the question that the producers of Maker Faire Vienna have kept in mind this year. How can this technology improve the world around us? How can we use our skills to help those who need assistance? How can we utilize […]
The post Shaping the Cities of the Future At Maker Faire Vienna appeared first on Make: DIY Projects and Ideas for Makers.
This Wicked Puzzle Box Protects Your Dice
 Inspiration is a funny thing, there’s no telling where it can come from. If you were to glance at this puzzle box for dice, made by Jay and Jamie from Wicked Makers, you’d never guess that the inspiration came, not from some mythical tale, but from a childproof kitchen cabinet. […]
The post This Wicked Puzzle Box Protects Your Dice appeared first on Make: DIY Projects and Ideas for Makers.
Garmin revamps entire Forerunner family, new smartwatches start at $199
-
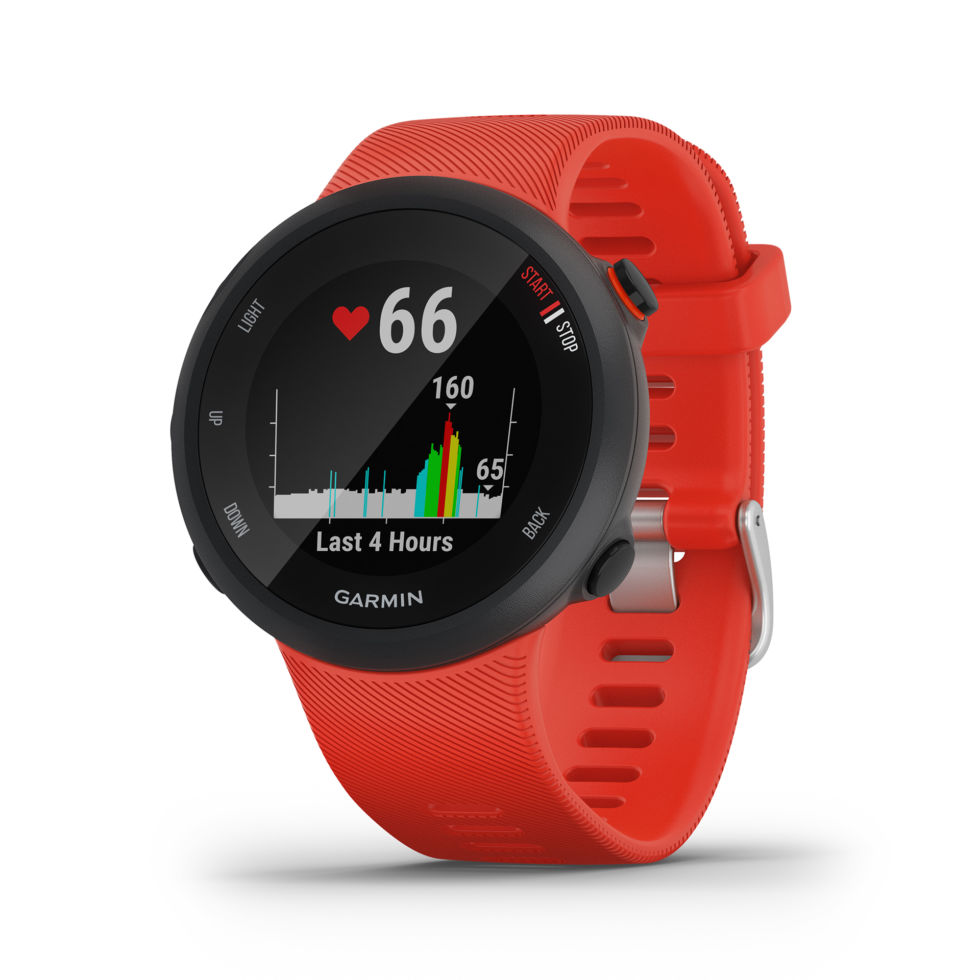
The new Garmin Forerunner 45 smartwatch. [credit: Garmin ]
Garmin has been slowly updating its smartwatches and fitness trackers over the past few years, and 2019 appears to be the year of the Forerunner. Today, Garmin announced three new types of Forerunner smartwatches—the Forerunner 45 and 45S, the Forerunner 245 and 245 Music, and the Forerunner 945—that will replace all but one of its existing Forerunner lineup. The remaining device is the $449 Forerunner 645 Music, which came out about one year ago and was the first of Garmin's wearables to have onboard music storage.
The new devices that make up the new lineup have slightly new designs and many new features. However, Garmin's naming system doesn't really help differentiate one smartwatch from another, so we'll break down the devices here. The most affordable of the bunch are the Forerunner 45 and 45S, both of which start at $199. The "S" signifies a smaller case size, so users can choose between the 42mm Forerunner 45 or the 39mm Forerunner 45S.
Garmin says these are designed for newbie runners or those starting a new exercise plan, and that thinking likely led to its affordable price tag and its array of features. Like most Garmin smartwatches, the Forerunner 45 and 45S track all-day activity and sleep, deliver smartphone alerts to your wrist, and are easy on the eyes thanks to an always-on, sunlight-friendly display. Even though the Forerunner 45 watches are the most affordable of the bunch, they still have a heart-rate monitor and built-in GPS, so users can make outdoor runs without the help of a smartphone.
Read 10 remaining paragraphs | Comments


Fritzing Is Back, And This Time It’s Written In JavaScript!
Fritzing has been stuck in the mud for just over a year now. There were no updates for many months, and members of the community wondered what was going on. Now, things might be turning around: Fritzing is being rebooted by community members, and there’s a roadmap of upcoming features.
The biggest takeaway from the GitHub discussion is that there simply aren’t enough developers for Fritzing. Fritzing is written in C++ and Qt, and there simply aren’t enough skilled devs to work on it. Future versions of Fritzing will be written in JavaScript.
Other developments in store for Fritzing include clearing out the number of open issues, making a new alpha, generally clean up the entire codebase, and prepare for a release. To that end, there’s also the Freetzing community to rebase the entire project with an emphasis on modularity.
Yes, Fritzing died a terrible death due to legal and funding issues. That still doesn’t mean Fritzing isn’t a valuable tool, though. With these new developments, and entirely new generation of hardware makers can dip their toes into the world of hardware development the easy way, and an entirely new generation of Open Source developers can work on making Fritzing the best tool it can be. There’s never been a better time to get started in Fritzing.
Hacking A Cheap eBay Frequency Counter
eBay is a wondrous land, full of Star Wars memorabilia in poor condition, old game consoles at insane markups, and a surprising amount of DIY electronics. [TheHWCave] found himself tinkering with a common frequency counter kit, and decided to make a few choice improvements along the way (Youtube link, embedded below).
The frequency counter in question is a common clone version of [Wolfgang “Wolf” Büscher]’s minimalist PIC design. Using little more than a PIC16F628 and some seven-segment displays, it’s a competent frequency counter for general use. Clone versions often add a crystal oscillator tester and are available on eBay for a fairly low price.
[TheHWCave] found that the modifications were less than useful, and developed a way to turn the tester components into a more useful signal preamp instead. Not content to stop there, custom firmware was developed to both improve the resolution and also add a tachometer feature. This allows the device to display its output in revolutions per minute as opposed to simply displaying in hertz. By combining this with an optical pickup or other RPM signal, it makes a handy display for rotational speed. If you’re unfamiliar with the theory, read up on our phototachometer primer. If you’re looking to modify your own kit, modified firmware is available on Github.
We’ve seen other eBay kit specials modified before. Being cheap and using commodity microcontrollers makes them a ripe platform for hacking, whether you just want to make a few tweaks or completely repurpose the device.
[Thanks to Acesoft for the tip!]
3D Printing A Lifting Body Aircraft
When you think of unconventional aircraft, flying wings have had plenty of time in the sun over the last few decades. With striking designs like the B-2 Spirit and F-117A Nighthawk on the flight line, it’s no surprise. The lifting body never really caught on, however, and it languishes in ignominy to this day. Despite their obscurity, [rctestflight] decided to 3D print a few lifting bodies for himself and take them out for a field test (YouTube video, embedded below).
Most aircraft have a body designed with low drag, and wings designed to provide lift. Lifting body aircraft focus the body design on providing that lift and often have no real wing to the design, needing only control surfaces to compliment the body. For this project, several different designs were constructed, with the craft being drop-launched from a multirotor at significant altitude. Initial tests were hamstrung by stability problems, both due to center of gravity issues and uncertain aerodynamic phenomena. The early designs were particularly prone to suddenly entering an unrecoverable flat spin. Later modifications included the addition of further stabilizers, which helped performance somewhat.
3D printing is a great way to experiment with aerodynamic phenomena, as it’s easy to create all manner of complicated geometries to tinker with. [rctestflight] has done solid work developing a basic craft, and we’d love to see the work continue with powered tests and more development. If flying wings are more your jam, though, you can 3D print those too. Video after the break.
Benchmarking a Garbage Disposal Using The 3DBenchy Tugboat
We’ve always had a love-hate relationship with 3DBenchy, the tugboat-shaped 3D printer calibration target. On one hand, it’s incredibly useful to have a common, widely used, and challenging benchmark object to evaluate printer performance and improve tuning, but we’d somehow like to get back the countless frustrated hours we’ve spent trying to get the damn thing perfect with various printers. So, it was with no little joy that we watched the video below by [Eric R Mockler], in which he uses 3DBenchy prints to benchmark his newest acquisition: a new-in-box garbage disposal he scored off Craigslist. Take that, tugboat!
[Eric] is considering using the disposal as the first step in a failed-print-recycling method to ultimately turn the waste back into filament, presumably to print more tugboats. The tiny bits produced by the disposal should provide a reasonable substitute for pelleted plastic feedstock going into a filament extruder, if the disposal is up to the task, that is. Reasoning that any device capable of grinding chicken bones should handle little plastic tugboats just as well, [Eric] gave it shot, and found that the ⅓-horsepower disposal had no problem grinding even 100%-infill PLA prints.
The video is short and to-the-point, so we’ll even excuse the portrait orientation, just this once. If you’re considering recycling your failed prints, too, you’ll also need a filament extruder, and we’ve got you covered with a low-cost version, or a high-throughput one.
Monday, April 29
Flying Sticks Are Now A Thing
Fixed-wing planes and helicopters are no longer the darling of the RC world. Even quadcopters and other multirotors are starting to look old hat, as the community looks to ever more outrageous designs. [rctestflight] has slimmed things down to the extreme with this coaxial bicopter build, also known as the Flying Stick (Youtube video, embedded below).
The initial design consists of two brushless outrunner motors fitted with props, rotating in opposite directions to cancel out their respective torques. Each is mounted on a gimbal, setup to provide control authority. iNav is used as a flight controller, chosen due to its versatile motor mixing settings. The craft was built to test its ability at recovery from freefall, as a follow-on from earlier attempts at building a brushless “rocket” craft.
Performance is surprisingly good for what is fundamentally two props on a stick. Initial tests didn’t quite manage a successful recovery, but the repaired single-gimbal version almost achieves the feat. Multirotors in general struggle with freefall recovery, so more research in this area is definitely worthwhile. Video after the break.
Prankenstein: Watch Kari Byron and Tory Belleci’s TV Pilot that Never Got Made
 TV is a strange beast — what we watch usually seems so effortless and enjoyable, but many people don’t realize how much work never gets seen at all. And this isn’t just in footage that gets left on the editing room floor after squeezing weeks of shooting into a 30 […]
The post Prankenstein: Watch Kari Byron and Tory Belleci’s TV Pilot that Never Got Made appeared first on Make: DIY Projects and Ideas for Makers.
Doom, Quake, other id shooters get open source iOS ports
Doom 3 running on iOS via Tom Kidd's recent port.
A lone coder has ported many of id Software's classic shooters to Apple's iOS and tvOS, though you'll have to do a bit of work to get them working on your iDevices.
The porting story goes back to 2009, when id Software brought official versions of Wolfenstein 3D and the original Doom to the iOS App Store. Updates for those ports stopped in 2014, though, and that became a problem in 2017, when iOS 10.3 officially stopped supporting "legacy" apps developed with a deprecated 32-bit codebase.
That sunsetting inspired mobile developer Tom Kidd, who noted that both Wolfenstein 3D and Doom had long been available as open source apps on id Software's GitHub page, complete with the iOS versions of their respective engines. "I went and did the work to update them and get them working in the latest versions of iOS," Kidd wrote last year. "This wound up being both harder and easier than I expected."
Read 5 remaining paragraphs | Comments


ESP32 Adds Bluetooth to GameCube Controllers
While it might not be the most traditional design, there’s no debating that Nintendo created something truly special when they unleashed the GameCube controller on an unsuspecting world back in 2001. Hardcore fans are still using the controller to this day with current-generation Nintendo consoles, and there’s considerable interest in adding modern conveniences like USB support to the nearly 20-year-old design.
One particularly promising project is the BlueCubeMod created by [Nathan Reeves]. He’s developed a small custom PCB that can be installed into an official GameCube controller to turn it into a Bluetooth device. You do have to sacrifice the original cord and force feedback for this mod, but we think many will see the ability to use this iconic controller with their computer or phone as a pretty fair trade.
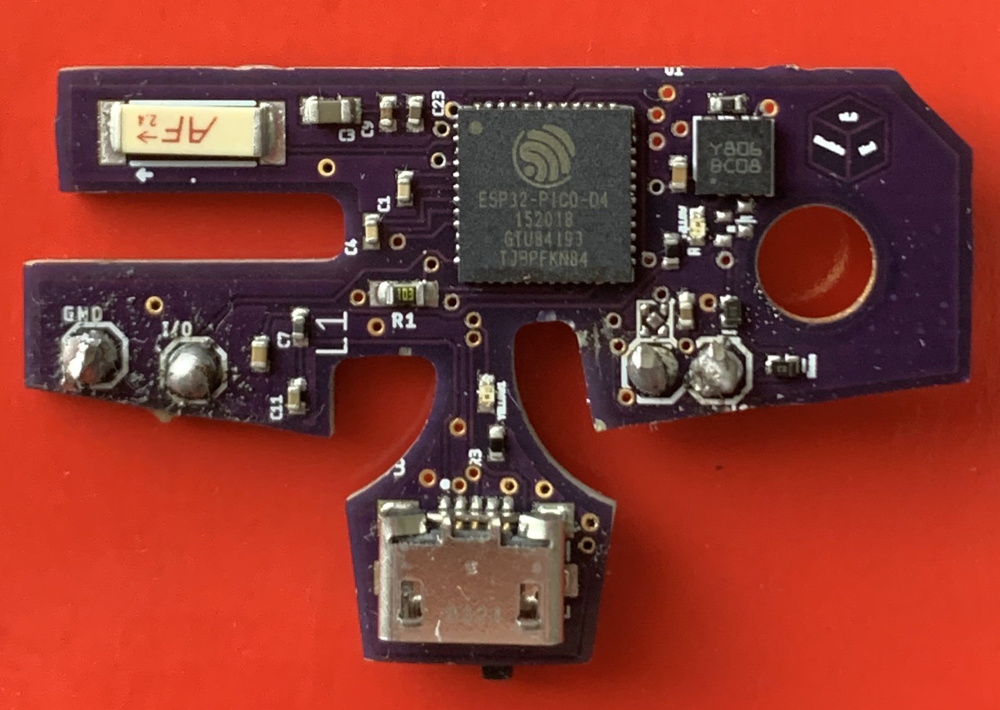 The PCB holds an ESP32-PICO-D4 which is operating as a standard Bluetooth HID controller for maximum compatibility with modern systems. Control signals are pulled directly from the controller’s original PCB with just two wires, making the installation very simple. Wondering where the power comes from? As the rumble motor isn’t supported anyway, that gets tossed and in its places goes a 700 mAh battery which powers the controller for up to six hours. Overall it’s a very clean modification that [Nathan] believes even beginners will be capable of, and he ultimately plans to turn this design into a commercial kit.
Currently you still need a receiver if you want to use the BlueCubeMod with the Nintendo Switch, but [Nathan] says he’s working on a way to get around that requirement by potentially switching out the ESP32 for a STM32 with a CC256x radio. He says this will give him more direct control over the Bluetooth communications, which should allow him to take into tackle the intricacies of talking to the Switch directly.
Of course, the GameCube did have an official wireless controller back in the day. We’ve seen modifications to get the WaveBird to get it talking to modern systems as well, but there’s something to be said for slimmer form factor of the original edition.
Beluga Black Ops: Norwegians discover Russian spy whale
-

A beluga whale discovered off Norway's coast, wearing a harness that had an adapter for a GoPro camera, according to authorities. [credit: Norwegian Directorate of Fisheries ]
Evidence suggests that the Russian Navy has been looking for new ways to leverage what amounts to the original underwater "drone"—militarized cetaceans. Norwegian fishermen discovered a friendly beluga whale in the Barents Sea off the northeast coast of Norway on April 25. Belugas are native to the Barents, so the whale's presence wasn't the surprise—the surprise was that it was fitted with a camera harness with Russian markings.
The beluga kept approaching fishing boats and rubbing against them in an apparent effort to remove the harness. After failed attempts to remove the harness themselves, fishermen sent photos to a marine biologist with Norway's Directorate of Fisheries, and they reported that the whale was in distress. A Fisheries boat was in the area and responded, as reported by a Directorate of Fisheries spokesperson on Facebook:
The Directorate of Fisheries' oversight boat Rind was in the area and was asked to assist to release the whale for the tight straps. The crew of the Marine Service are trained to free whales from ropes and fishing gear. After a little lure with cod fillets, and with the fisherman Joar Hesten getting into the water wearing a survival suit, the inspectors Jørgen Ree Wiig and Yngve Larsen from the Marine Service and the Horse managed to release the whale…
The whale has probably escaped from Russia where it may have been trained to perform different missions such as underwater photography.
Video from Norwegian television of an attempt to remove the harness on a beluga.
The harness was reportedly marked with the label "Equipment St. Petersburg" and had an attachment point for a GoPro camera. Audun Rikardsen, a professor at the Norwegian Arctic University in Tromsø (UiT), told Norway's VG that neither Norwegian nor Russian academic researchers put harnesses on whales. "I have been in contact with some Russian researchers," Rikardsen said. "They can confirm that it is nothing they are doing. They tell me that most likely is the Russian Navy in Murmansk."
Read 8 remaining paragraphs | Comments


AI at the Edge Hack Chat
Join us Wednesday at noon Pacific time for the AI at the Edge Hack Chat with John Welsh from NVIDIA!
Machine learning was once the business of big iron like IBM’s Watson or the nearly limitless computing power of the cloud. But the power in AI is moving away from data centers to the edge, where IoT devices are doing things once unheard of. Embedded systems capable of running modern AI workloads are now cheap enough for almost any hacker to afford, opening the door to applications and capabilities that were once only science fiction dreams.
John Welsh is a Developer Technology Engineer with NVIDIA, a leading company in the Edge computing space. He’ll be dropping by the Hack Chat to discuss NVIDIA’s Edge offerings, like the Jetson Nano we recently reviewed. Join us as we discuss NVIDIA’s complete Jetson embedded AI product line up, getting started with Edge AI, and where Edge AI is headed.

Our Hack Chats are live community events in the Hackaday.io Hack Chat group messaging. This week we’ll be sitting down on Wednesday, May 1 at noon Pacific time. If time zones have got you down, we have a handy time zone converter.
Click that speech bubble to the right, and you’ll be taken directly to the Hack Chat group on Hackaday.io. You don’t have to wait until Wednesday; join whenever you want and you can see what the community is talking about.

Firefly has successfully tested the upper stage of its Alpha rocket
-

Last Thursday Firefly Aerospace tested the second stage of its Alpha rocket. [credit: Edwards Media ]
Last Thursday, on a green expanse at the edge of the Texas Hill Country, Firefly Aerospace prepared to test the second stage of its Alpha rocket. After years of development, engineers bolted the rocket stage to a vertical test stand and began to feed kerosene and liquid oxygen into the engine.
Then, for 300 seconds, the rocket's Lightning-1 engine fired, blowing white and yellow flame out of its exhaust nozzle. The five-minute test demonstrated the performance of the engine and upper stage over an entire cycle of flight in space, during which the upper stage would boost a satellite and insert into orbit.
During the test, all of the second stage's flight avionics, structures, and propulsion systems were subjected to a sustained firing consistent with a normal flight mission. According to Firefly, preliminary analysis of data from the test show that all of the rocket's systems performed nominally, and a post-test inspection revealed no observable degradation of the stage systems.
Read 3 remaining paragraphs | Comments


Easter Egg Turns Nintendo Switch into a Development Platform
Like a lot of game developers [Amir Rajan] likes to put Easter Eggs into his creations. His latest Nintendo Switch title, A Dark Room, has a very peculiar one, though. Instead of a graphic or a Tetris game, [Amir] put a code editor and a Ruby interpreter in the game.
Ruby is a language that originated in Japan and is popular with Web developers, in particular. It has dynamic typing, garbage collection, and supports several different programming styles. We aren’t sure what you’d do with it on a Nintendo Switch, but any time we can program a gadget, it makes us happy.
You don’t have to hunt hard for the Easter Egg since [Amir] gives instructions. Simply hook up a USB keyboard and press the tilde key. If you read the comments, there is a lot of debate about if Nintendo will pull the game or not. There are other examples of titles that allow some form of programming, but apparently, there is also some sensitivity to giving users too much access to the device.
We aren’t sure why [Amir] chose Ruby. Not that it is a bad language, but if you wanted a little hackable interpreter, we could think of other options.
The Switch, it turns out, is highly hackable. We’ve really enjoyed some of the hardware hacks.
Samsung embraces vertical videos with a $16,000 vertical TV
-

A few wild new Samsung TV designs. We're interested in the "The Sero," the two TVs in the bottom right. [credit: Samsung ]
It's tough to stand out in the TV market, where everyone is shipping beautiful 4K panels in pretty much whatever size you want. Samsung is hoping to turn heads with a few wild "concept lifestyle TV" designs, which it rounded up in a Korean-language press release today. There's the previously announced "The Frame," which looks like a framed picture and displays artwork when not in use. There's "The Serif," which is mounted on four legs, looking kind of like a canvas easel. And then there's the real head-turner, "The Sero," which is a vertical TV.
The Sero isn't vertical all the time. The 43-inch panel is mounted on a rotating stand, allowing you to get up, walk over to the TV, and swing it from landscape to portrait—kind of like working the world's biggest smartphone. Through Google Translate, Samsung's press release tells us it "analyzed the characteristics of the Millennial generation" to come up with the TV design, which is purpose-built for watching the vertical videos you find on services like Instagram. Of course, the entire scourge of vertical videos was created because people couldn't be bothered to rotate their 5-inch smartphones, so I don't know about the idea that people will get off the couch to rotate their 43-inch TV.
Samsung says the TV comes with NFC pairing and a "simple mirroring function" to get your smartphone videos on the TV. Like Samsung's other TVs, this has an ambient mode that can display images, photos, clocks, and more when not in use. There's a microphone with Samsung's Bixby assistant built-in.
Read 1 remaining paragraphs | Comments


Beirut Mini Maker Faire 2019, Culture Mixed by East, West, and Makers
 On April 6, a DIY festival Beirut Mini Maker Faire was held in Beirut, the capital city of Lebanon, a small country in the Middle East. This was the first held in Beirut. The development of creative ideas rooted in Lebanon and a sincere exchange of views on the startup […]
The post Beirut Mini Maker Faire 2019, Culture Mixed by East, West, and Makers appeared first on Make: DIY Projects and Ideas for Makers.
Bike Computer Exploration Uncovers a Hidden Android
As a happy side-effect of the smartphone revolution, the world is now awash with tiny computers that are incredibly cheap thanks to the nearly unfathomable volumes in which their components are manufactured. They’re wouldn’t be a $10 Raspberry Pi Zero if the billions of smartphones that were pumped out before it hadn’t dropped the cost of the individual components to literal pennies. That also means that smartphone hardware, or at least systems that are very close to it, have started to pop up in some unexpected places.
When [Joshua Wise] recently took ownership of a Wahoo ELEMNT BOLT bike computer, he wondered how it worked. With impressive list of features such as Internet connectivity, GPS mapping, and Bluetooth Low Energy support, he reasoned the pocket-sized device must have some pretty decent hardware under the hood. With some poking and prodding he found the device was powered by a MediaTek SoC and incredibly had a full-blown install of Android running in the background.
 So how does one find out that their lowly bike computer is essentially a cleverly disguised smartphone? If you’re [Joshua], you listen to who it’s trying to talk do when doing a firmware update over the Internet. He used
 mitmproxy running between his Internet connection and a WiFi access point setup specifically for the BOLT, from there, he was able to see all of the servers it was connecting to. Seeing the device pull some data down from MediaTek’s servers was a pretty good indication of whose hardware was actually inside the thing, and when it ultimately downloaded some Android .apk files from the Wahoo website, it became pretty clear what operating system it was running underneath the customized user interface.
Further examination of the Bolt’s software brought to light a few troubling issues. It turned out that the firmware made extensive use of Apache-licensed code, for which no attribution was given. [Joshua] contacted the company and was eventually referred to the Wahoo’s CEO, Chip Hawkins. Refreshingly, Chip was not only very interested in getting the licensing issues sorted out, but even had some tips on hacking and modifying the device, including how to enable ADB.
Before the publication of this article, we reached out to Chip Hawkins (yes, he really does respond to emails) for a comment, and he told us that not only has he made sure that all of the open source packages used have now been properly attributed to their original authors, but that his team has been providing source code and information to those who request it. He says that he’s been proud to see owners of his products modifying them for their specific needs, and he’s happy to facilitate that in any way that he can.
Open source license compliance is a big deal in the hacking community, and we’ve seen how being on the wrong side of the GPL can lead to lost sales. It’s good to see Wahoo taking steps to make sure they comply with all applicable licences, but we’re even more impressed with their positive stance on customers exploring and modifying their products. If more companies took such an enlightened approach to hacking, we’d all be a lot better off.
[Thanks to Roman for the tip.]
Reverse Engineering An Insulin Pump With An SDR And Decapping
Insulin pumps are a medical device used by people with diabetes to automatically deliver a measured dose of insulin into their bloodstream. Traditionally they have involved a canula and separate connected pump, but more recent models have taken the form of a patch with a pump mounted directly upon it. When [Pete Schwamb]’s daughter received one of these pumps, an Omnipod, he responded to a bounty offer for reverse engineering its RF protocol. As one of the people who helped create Loop, an app framework for controlling insulin delivery systems, he was in a particularly good position to do the work.
The reverse engineering itself started with the familiar tale of using an SDR to eavesdrop on the device’s 433MHz communication between pump and control device. Interrogating the raw data was straightforward enough, but making sense of it was not. There was a problem with the CRC algorithm used by the device which had a bug involving a bitwise shift in the wrong direction, then they hit a brick wall in the encryption of the data. Hardware investigation revealed a custom chip in the device, and there they might have stalled.
But the international reverse engineering community is not without resources and expertise, and through the incredible work of a university researcher in the UK (whose paper incidentally includes a pump teardown) they were able with an arduous process supported by many people to have the firmware recovered through decapping the chip. Even once they had thus extracted the encryption code and produced their own software their problems were not over, because communication issues necessitated a much better antenna on the RileyLink Bluetooth bridge boards that translated Bluetooth from a mobile phone to 433 MHz for the device.
This precis doesn’t fully encapsulate the immense amount of work over several years by a large group of people with some very specialist skills that reverse engineering the Omnipod represents. To succeed in this task is an incredible feat, and makes for a fascinating write-up.
Thanks [Alex] for the tip.
3D Printing with Multiple Soluble Filaments
Complex 3D-printed designs often require the use of an automatically generated support structure around them for stability. While this enables some truly incredible results, it adds considerable time and cost to the printing process. Plus there’s the painstaking process of removing all the support material without damaging the object itself. If you’ve got a suitably high-end 3D printer, one solution to this problem is doing the supports in a water soluble filament; just toss the print into a bath and wait for the support to dissolve away.
But what if you’re trying to print something that’s complex and also needs to be soluble? That’s precisely what [Jacob Blitzer] has been experimenting with recently. The trick is finding two filaments that can be printed at the same time but are dissolved with two different solutions. His experimentation has proved it’s possible to do with consumer-level hardware, but it isn’t easy and it’s definitely not cheap.
 You might be wondering what the possible application for this technique is. For [Jacob], he wanted to be able to print hollow molds in complex geometric shapes that would ultimately be filled with concrete. The molds required extensive internal supports that would have been all but impossible to remove if they weren’t printed in a soluble filament. But he also wanted to be able to dissolve the mold once the concrete inside had cured. So he needed one easy to dissolve filament for the supports, and a harder to dissolve one for the actual mold.
For the mold itself, [Jacob] went with High Impact Polystyrene (HIPS) which can be dissolved with an industrial degreaser called Limonene. It’s expensive, and rather nasty to work with, but it does an excellent job of eating away the HIPS so that’s one problem solved. Finding a water-soluble filament for the supports that could be printed at similar temperatures to the HIPS took months of research, but eventually he found one called HyroFill that fit the bill. Unfortunately, it costs an eye-watering $175 USD per kilogram.
So you have the filaments, but what can actually print them at the same time? Multi-material 3D printing is a tricky topic, and there’s a few different approaches that have been developed over the years. In the end, [Jacob] opted to go with the FORMBOT T-Rex that uses the old-school method of having two individual hotends and extruders. It’s the simplest method conceptually, but calibrating such a machine is notoriously difficult. Running two exotic and temperamental filaments at the same time certainly doesn’t help matters.
After all the time, money, and effort put into the project (he also had to write the software that would create the 3D models in the first place) [Jacob] says he’s not exactly thrilled with the results. He’s produced some undeniably stunning pieces, but the failure rate is very high. Still, it’s fascinating research that appears to be the first of its kind, so we’re glad that he’s shared it for the benefit of the community and look forward to seeing where it goes from here.