Monday, April 30
The TCL 6 series Roku TVs launch tomorrow, starting at $650

Chinese brand TCL has announced pricing for its new 6-Series Roku TVs, the follow-ups to last year's extremely popular P-Series. The 6-Series improves on last year's in terms of picture quality and comes in both 55-inch and 65-inch sizes—last year's models only came in a 55-inch configuration.
The 55-inch model is currently priced at $649.99, and the 65-inch model comes in at $999.99. That's in line with what last year's TVs cost. As we've previously reported, the main improvement (apart from the larger size) in play here is an expanded number of full-array local dimming zones. Last year's P-Series had 72 zones, whereas this year's 55-inch 6-Series TV has 96 zones, and the 65-inch has 120 zones.
Read 6 remaining paragraphs | Comments


Russia’s floating nuclear power plant follows in the footsteps of an Army barge

US National Archives and Records Administration
Try as I might, I'm not perfect. My goal is to get every detail in every story right, but sometimes a post gets through with a factual error. Such was the case last night, in a story about Russia's new floating nuclear power plant. Some background research led me to believe that it was the first of its kind.
A couple of Ars readers, thankfully, disabused me of that notion quickly (one cool thing about writing for Ars is you always know that you're writing for a bunch of people who are dramatically smarter than yourself). Though such a power system is quite rare, there has been another floating nuclear plant that we can point to as an example: a US Army barge called the Sturgis, which was installed in Panama during the Vietnam War.
Read 4 remaining paragraphs | Comments


Bionic Beaver: A first look at Ubuntu’s latest LTS desktop

Last week, Canonical released Ubuntu 18.04 LTS, the lastest long-term support version of the Ubuntu Linux distribution. Ars is working on a full review of the release, code-named "Bionic Beaver." But I wanted to share some first impressions of the desktop, which is a major advance over the last LTS version.
Canonical made a bit of a U-turn in its interface plans while developing the last interim release of Ubuntu (17.10, code-named "Artful Aardvark")—dropping development of its homegrown Unity interface and application launcher (as well as development of an Ubuntu phone), saying goodbye to the Ambiance interface theme of old, and embracing the GNOME 3.28 desktop instead. Also significant is the integration of Snapcraft's "snap" format—a universal containerized installer format for packaged applications on all Linux platforms—into Ubuntu's application store.
Read 2 remaining paragraphs | Comments


Hobby Ergonomics for Painting Miniatures and Other Small Objects
 The basics on maintaining good posture and reducing back, neck, and hand fatigue after hours of close-up painting.
The post Hobby Ergonomics for Painting Miniatures and Other Small Objects appeared first on Make: DIY Projects and Ideas for Makers.
This Dust Collector Will Blow You Away.
As [Marius Hornberger] was working in his woodshop, a thunderous bang suddenly rocked the space. A brief search revealed the blower for the dust collector had shifted several inches despite being stoutly fastened down. Turns out, the blower had blown itself up when one of the impeller fins came loose. Time to revise and build a bigger, better dust collector!
[Hornberger] is thorough in describing his process, the video series chronicles where he went astray in his original design and how he’s gone about improving on those elements. For instance, the original impeller had six fins which meant fewer points to bear the operating stresses as well as producing an occasionally uncomfortable drone. MDF wasn’t an ideal material choice here either, contributing to the failure of the part.
Learning a lesson from this ordeal, the new blower housing uses .8mm piece of galvanized steel for its strength in case of another accident — the original’s plywood was solid enough to keep the destruction contained, but no sense in taking chances this time around. Fortunately, the original motor hadn’t been damaged during the accident, so he was able to reuse it after making a new shaft key — brass isn’t as durable as you might want for heavy use. A few other design elements were also carried over from the previous setup — such as packing foam bushings and mounting techniques — since they didn’t break and were in no want of fixing. He also rebuilt the filter box to accommodate for the larger airflow volume, and incorporated dozens of other details that are worth watching to find out.
It’s a real treat to watch [Hornberger] show off his fastidious woodworking talent in bringing this project together. For more of his superb work, check out this scissor lift table he built to help him around the shop!
[Thanks for the tip, Keith!]
More Human Than Human review: Light on killer robots, killer on AI inspection

Tommy Pallotta and Femke Wolting
More Human Than Human comes along at a time when perhaps no reminder is necessary: leaving life to bots—whether that means machine learning, artificial intelligence, genuine human-like androids, etc.—might get messy for us humans. Westworld gives us one version of a sentient-machine uprising every Sunday, and news cycles like those involving Cambridge Analytica and Facebook provide gentler reminders that creating increasingly intelligent tech platforms can lead to unwanted manipulation and consequences right now.
But the new documentary (which debuted at South by Southwest and plays at the acclaimed Hot Docs festival in Toronto this week) doesn’t set out to paint a picture of some futuristic hellscape. Instead, it wants viewers to pause for a second to consider the forever promise of technology. “We grew up in the shadow of the space program, really believing that tech was going to make our lives better,” co-director Tommy Pallotta told Ars. “For five decades, we’ve seen this promise that tech would create more leisure time for us [and] that it’ll make all our lives better. It’s kind of insane we’re still sold the same promise, but what do we really have to show for it?”
Read 12 remaining paragraphs | Comments

Decellularization: Apples to Earlobes
Our bodies are not like LEGO blocks or computers because we cannot swap out our parts in the living room while watching television. Organ transplants and cosmetic surgery are currently our options for upgrades, repairs, and augments, but post-transplant therapy can be a lifelong commitment because of rejection. Elective surgery costs more than a NIB Millenium Falcon LEGO set. Laboratories have been improving the processes and associated treatments for decades but experimental labs and even home laboratories are getting in on the action as some creative minds take the stage. These folks aren’t performing surgeries, but they are expanding what is possible to for people to do and learn without a medical license.
One promising gateway to human building blocks is the decellularization and recellularization of organic material. Commercial scaffolds exist but they are expensive, so the average tinkerer isn’t going to be buying a few to play with over a holiday weekend.
Let’s explore what all this means. When something is decellularized, it means that the cells are removed, but the structure holding the cells in place remains. Recellularizing is the process where new cells are grown in that area. Decellularizing is like stripping a Hilton hotel down to the girders. The remaining structures are the ECM or the Extra Cellular Matrix, usually referred to as scaffolding. The structure has a shape but no functionality, like a stripped hotel. The scaffolding can be repopulated with new cells in the same way that our gutted hotel can be rebuilt as a factory, office building, or a hospital.
Decellularizing Plant Matter
When plants are decellularized, we are left with cellulose, but that scaffolding can be repopulated with animal cells. Conversely, decellularized animal parts can be stripped to collagen then repopulated with plant cells. This is some next-level Frankenstein stuff and may confuse some vegetarians.
Stripping plant cells from the scaffolding may seem like a mysterious dark art, but it uses easy-to-find ingredients and nothing more exotic than a glass container. Pumps and heaters help, but you can decellularize some fruits and vegetables in your kitchen right after reading this. This process is pretty well understood, and there are already published processes. The first step is to rupture the cell walls by freezing the fruit or vegetable. Slices work well because they expose a lot of surface area and you can plainly see the internal structure of your subject afterward. Once frozen, the slices can be bathed in a solution of SDS and water. SDS is “science talk” for soap. Ordinary dish soap and water may do the trick but commercial SDS is inexpensive and easy to buy from the regular sources. This definitely carries the message of, “Try this at home.” The water will become cloudy as cells leak out, so change it regularly.
Fibrous material, like broccoli, will take longer than soft fruit like strawberries. Wood is also a candidate, but it is actually removing the lignin, and the directions are different. Seeds resist this process because their shells are made to protect against adverse conditions. As ghostly fruit goes, dark seeds on a ghastly white skeleton are pretty trendy.
Decellularizing Animal Parts
Decellularizing animal parts is trickier, but it can be more rewarding depending on what you want. A ghost heart on the shelf is probably going to start some conversations. At a minimum, you will find out which of your friends are extremely squeamish. As of writing this, there were no pictures of a decellularized heart under a black light. Just putting that idea out there.
Animal cells have more and different substances to dissolve so there are more and different steps. Fortunately, many of the steps can be performed with inexpensive ingredients, some of which can still be found in a kitchen or medicine cabinet.
This process is best explained by [The Thought Emporium] who manages to keep an in-depth video under seven minutes without talking over our heads. Maybe it goes without saying, but there are clips of a heart before decellularization so be prepared if that sort of thing isn’t your thing. Also, there is more “science talk” like Retrograde Coronary Profusion, but he explains that nicely.
Lend Me Your Ears
[The Thought Emporium] does a phenomenal job bringing outrageous science to the doorstep of any curious hacker, but if we want to push the limits of what is possible with these scaffolds, we turn to [Andrew Pelling] who has taken the stage at TED talks for his work innovation with recellularizing plant matter. His most notable work is taking apple scaffolds and growing mammalian cells on them in the shape of a human ear. At its most basic, apples were decellularized, carved to look like an ear, and seeded with cells.
Cells grown into a scaffold belong to the receiver, and since they are the host’s cells, they don’t reject like donor material would. This alone makes research important, but making new organs for people on waiting lists is even more vital. At the hacker level, we may see a home-grown Spock ear transplanted in our lifetimes. [Pelling] sees notable similarities between asparagus and a human spinal cord.
Whether decellularization and recellularization will have medical use in the future is up for grabs. What’s clear, though, is that you can play around with this cutting-edge biotech right now, in your own kitchen. Get to it!
The Hyundai Kona: A well-equipped crossover starting at just $19,500

Hyundai
You don't call your new automobile the Kona if your intention is to build a serious, stately, and expensive grand touring model to rub shoulders with the finest European imports. You dust off such a Polynesian presentation because you want to attract the young, the carefree, and (therefore) the broke.
Kona (or Kailua-Kona, technically) is the tourism capital of the Big Island of Hawaii. It's all about sunshine and seashells, shave ice and snorkeling. The place offers a playful escape from the rigors of serious everyday realities, and Hyundai looks to do the same with this brand new compact crossover.
Read 15 remaining paragraphs | Comments


Tiny Arduino + FPGA = Sno
Alorium rolled out a new product late last year that caught our attention. The Sno (pronounced like “snow”) board is a tiny footprint Arduino board that you can see in the video below. By itself that isn’t that interesting, but the Sno also has an Altera/Intel Max 10 FPGA onboard. If you aren’t an FPGA user, don’t tune out yet, though, because while you can customize the FPGA in several ways, you don’t have to.
Like Alorium’s XLR8 product, the FPGA comes with preprogrammed functions and a matching Arduino API to use them. In particular, there are modules to do analog to digital conversion, servo control, operate NeoPixels, and do floating point math.
However, you can reprogram the FPGA to have other functions — known as XBs or Xcelerator Blocks — if you like. The only problem we see is that, so far, there aren’t many of them. In addition to the stock XBs, there is one that will do quadrature decoding for dealing with things like shaft encoders. There are a few others you can find on their GitHub page. You can get an idea for the workflow by looking at this tutorial for the XLR8 board.
Of course, you can write your own FPGA configurations as you see fit, but they also provide a standard workflow — OpenXLR8 — that lets you build your own blocks that operate just like their blocks. It would be easy to imagine an “app store” concept where people develop custom blocks and make them available.
We really like the idea of this device and it is certainly inexpensive. You can prototype on the XLR8 which looks like a UNO or you can put headers in the Sno. They also sell a breakout board that will make the Sno physically more like an UNO. We are surprised, though, that there are not more XBs created over the last two years.
The FPGA onboard is similar to the one on the Arrow board we looked at earlier this year, although that has some additional components like SDRAM. If you are looking for a project, it might be interesting to convert our PWM code into an XB.
Thanks to [K5STV] for showing us one of these.
Get to Know Your Fire Extinguisher with This Handy Chart
 Did you know that you can buy more than one type of fire extinguisher? Take a moment to familiarize yourself with each of their individual uses.
The post Get to Know Your Fire Extinguisher with This Handy Chart appeared first on Make: DIY Projects and Ideas for Makers.
Maker Pro News: How DIY Entrepreneurs Share Knowledge and Resources
 This past week, maker professionals were all about hardware, environmental awareness, and new ways to fabricate.
The post Maker Pro News: How DIY Entrepreneurs Share Knowledge and Resources appeared first on Make: DIY Projects and Ideas for Makers.
The Quest For The Reuleaux Triangle Bearing
[Angus Deveson] published a video on “solids of constant width” nearly a year ago. Following the release of the video, he had a deluge of requests asking if he could make a bearing from them. Since then, he’s tried a number of different approaches – none of which have worked. Until now…

What is a solid of constant width? A shape whose diameter is the same in all orientations, despite the fact that they aren’t circular. In particular, the Reuleaux Triangle is of interest; if you’ve heard of square drill bits, a Reuleaux Triangle is probably at play. Constructed from three circles, they make a neat geometrical study. When placed between two surfaces and rolled, the surfaces will stay parallel, despite the fact that the center of the triangle does not stay level.
In theory, this means they could be easily substituted for spheres in a classic roller bearing, but this turned out to be problematic – the first attempt determined how hard it was to get the shapes to roll instead of slide.
 [Angus] finally arrived at a working bearing after a ton of suggestions from the community, and trying a number of attempts until he was able to achieve what he set out to do. The trick was to create a flexible insert (3D printed as well) for the center of the triangle edge, which grips the surfaces the triangle comes into contact with. A frame is also made to hold the bearings in place and allows their centers to move up and down as necessary.
If the thrill seeker within you still isn’t satisfied, maybe you should try the Reuleaux Coaster…
Papercraft-Inspired Snake-bot Slithers like a Real One
Blend the Japanese folding technique of Kirigami with an elastomer actuator, and what have you got? A locomoting snake robot that can huff around its own girth with no strings attached! That’s exactly what researchers at the Wyss Institute and Harvard School of Applied Sciences did to build their Kirigami Crawler.
Expanding and contracting propel this crawler forward. As the actuator expands, the hatched pattern on the plastic skin flares out; and when it contracts, the skin retracts to a smoother form. The flared hatch pattern acts like a cluster of little hooks, snagging multiple contact points into the ground. When the skin retracts, these hooks fold back inside while giving the body a slight push forward in the process. It’s a clever tactic, and almost identical to the way real-world snakes propel themselves. In fact, after iterating on a few skin patterns, they found that a trapezoidal pattern, which most closely resembles that of snakeskin, can cover ground fastest.
We’re thrilled to see such authentic biomimicry come to us without any extreme tooling or special molds. Still not satisfied with your share of crawling robots for one day? Have a peek into the past, and indulge yourself with a sine-wave locomotion.
Thanks for the tip, [Olivia]!
Russia launched a floating nuclear power plant this weekend

Getty Images
On Saturday the world's first floating power plant left St. Petersburg, Russia, towed by two boats. The two-reactor, 70MW floating power plant is headed through the Baltic Sea and north around Norway, to a Russian town called Murmansk, where the boat will receive its fuel.
After a period of time in Murmansk, the power plant will be towed to a small Arctic town called Pevek, according to German broadcaster Deutsche Welle. The floating nuclear power plant, called the Akademik Lomonsov, doesn't have any of its own propulsion hardware, so being slowly towed to its destination is a necessity. The company that built the plant, state-owned Rosatom Corporation, said in a press release that the second stage of the journey, from Murmansk to Pevek, will commence in 2019, with fuel and crew aboard the boat/power plant.
Read 5 remaining paragraphs | Comments


Hackaday Links: April 29, 2018
Amazon has released the Echo Dot Kids Edition, an always-on, Internet-connected microphone. According to Amazon’s Children’s Privacy Disclosure, the Amazon Echo Dot Kids Edition collects data such as, ‘name, birthdate, contact information (including phone numbers and email addresses), voice, photos, videos, location, and certain activity and device information. The Amazon Echo Dot Kids Edition is able to read audiobooks for bedtime reading and teaches your children to live in a dystopian panopticon of Orwellian proportions. It comes in green, red, and blue.
 Kim Possible! The biggest news headline this week is the coming end of the Korean War. The peninsula has been in a state of war since 1950, but leaders from both countries have agreed to negotiate a treaty to replace the 60-year-old truce. There is also an agreement between the two countries for complete denuclearization. This is great news for Hackaday. Every day, we’re eyeing our North Korean readership. Some days we get a view, some days we don’t, but year over year we’re always getting more views. Will this treaty result in even more Hackaday readers in North Korea? Only time will tell. Here’s some music. It wasn’t a chicken.
The East Coast RepRap Festival is on. Inspired by the Midwest RepRap Festival, the ERRF is happening north of Baltimore on June 23rd and 24th. What’s it going to be like? Nobody knows! This is the first time ERRF is happening, but judging by MRRF standards, it should be awesome. Also, crab season.
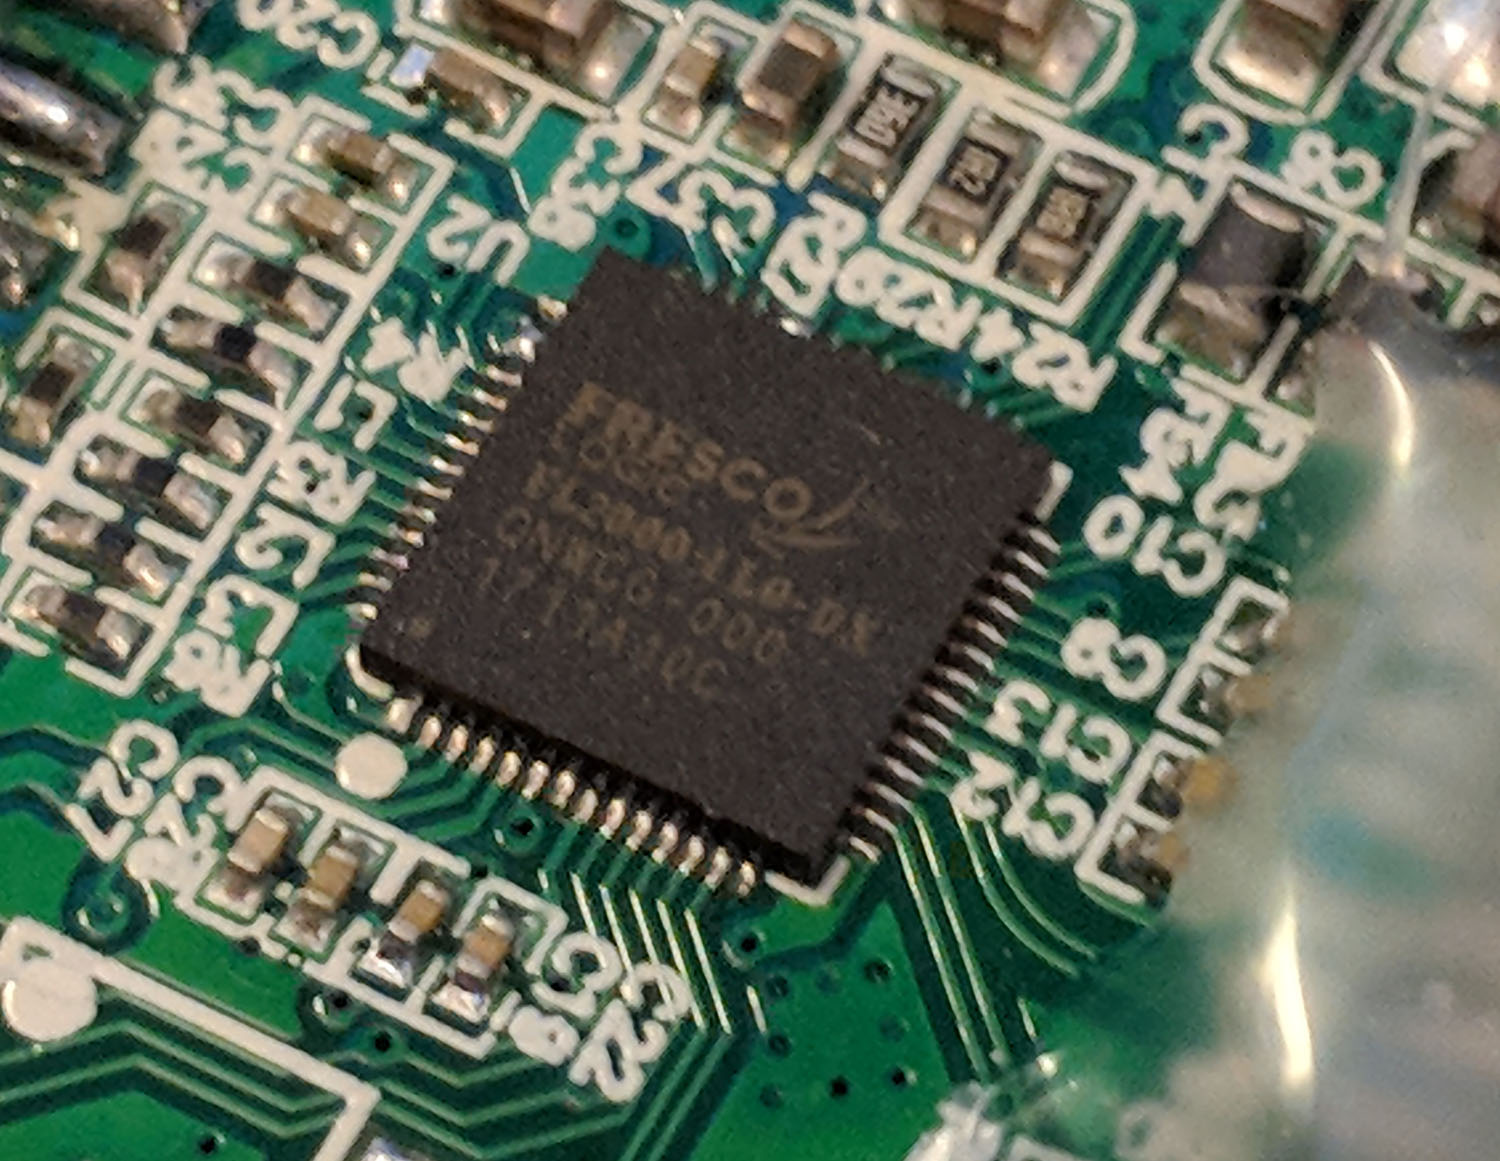
One of the most interesting hacks of this year is [Steve Markgraf]’s tool to allow transmit-only SDR through cheap USB 3.0 to VGA adapters. The hack relies on the Fresco Logic FL2000 chip and gives you the ability to transmit FM, TVB-T, and create your own GSM cell site. You can also spoof GPS to get something besides a rattata in Pokemon Go or hack your ankle bracelet to keep your parole officer off your back. The open question, though, is which USB to VGA adapter has the FL2000 chipset. I can confirm this one on Amazon has the relevant chipset. It’s a bit expensive at $15 (the same chipset is available from the usual eBay and AliExpress suppliers for $6), but if you’re looking for something that is available with Prime, there you go. Now we’re looking for shared OSH Park projects with a VGA input on one end and some antennas on the other. Make it happen, people.
Supercapacitors are awesome, but is it possible to fly a drone with a bank of them? Sure, for about 10 seconds. [dronelab] built a 7-cell, 200F supercap and managed to fly a little racing quad for about ten seconds. Not terribly great, but this is going to be awesome when we get multi-thousand Farad superultramegacaps.
Like Open Hardware? The Open Source Hardware Association is opening up the Ada Lovelace Fellowship for women, LGTBA+ and other minorities to attend the Open Hardware Summit. The deadline is tomorrow, so do it soon.
M3D has announced a new 3D printer that can print with four filaments. The Crane Quad is your basic i3 ripoff with an interesting extruder. It looks like it uses four tiny motors to feed filament into the main extruder motor. This isn’t really anything new; the Prusa i3 multimaterial upgrade does the same thing. However, M3D claims they have mastered color mixing. The Prusa upgrade doesn’t do mixing, and this is most likely the reason it works so well. Can M3D pull it off? This is a very, very, very hard problem.
Sunday, April 29
3D Printing Electronics Direct to Body
Some argue that the original Star Trek series predicted the flip phone. Later installments of the franchise used little badges. But Babylon 5 had people talking into a link that stuck mysteriously to the back of their hand. This might turn out to be true if researchers at the University of Minnesota have their way. They’ve modified a common 3D printer to print electronic circuits directly to the skin, including the back of the hand, as you can see in the video below. There’s also a preview of an academic paper available, but you’ll have to pay for access to that, for now, unless you can find it on the gray market.
In addition, the techniques also allowed printing biologically compatible material directly on the skin wound of a mouse. The base printer was inexpensive, an Anycubic Delta Rostock that sells for about $300.
The printer uses a specialized ink that contains silver flakes. It cures at room temperature which is good because you probably don’t want hot plastic burning into the back of your hand. That means the extrusion is more like a paste printer. However, that’s not the main innovation. The primary problem with printing on a person’s body is that people move, even if they try not to.
The new system puts temporary markers on the skin. The printer scans and adjusts its movement to match up with the moving hand or other body parts. Of course, to create really practical electronics, you’ll surely need some components that can’t be printed. In the paper, they show an LED with a 3D printed inductor that can couple to a power source.
This reminded us of FRESH, especially the part about printing directly into a wound. Who knows? This could lead to a whole new round of body modifications.
How to Put the ‘Pro’ in Prototype
It’s easy to get professional-quality finishes on your prints and prototypes if you take the right steps. In the final installment of his series about building with Bondo, product designer [Eric Strebel] shows us how it’s done no matter what the substrate.
How does he get such a smooth surface? A few key steps make all the difference. First, he always uses a sanding block of some kind, even if he’s just wrapping sandpaper around a tongue depressor. For instance, his phone holder has a round indent on each side. We love that [Eric] made a custom sanding block by making a negative of the indent with—you guessed it—more Bondo and a piece of PVC. The other key is spraying light coats of both primer and paint in focused, sweeping motions to allow the layers to build up.
If you need to get the kind of surface that rivals a baby’s behind, don’t expect to prime once, paint once, and be done with it. You must seek and destroy all imperfections. [Eric] likes to smooth them over with spot putty and then wet sand the piece back to smooth before applying more primer. Then it’s just rinse and repeat with higher grits until satisfied.
There’s more than one way to smooth a print, of course. Just a few weeks ago, our own [Donald Papp] went in-depth on the use of UV resin.
There’s one setpiece-and-superhero packed flick to watch this week—Batman Ninja

Box-office figures and passionate Internet comment threads be damned. If you want dizzying and varied action set-pieces, a laundry list of beloved characters within a single adventure, and everything from time travel to quips about miso to giant robots juxtaposed against feudal Japan... well, there's only one recently released blockbuster superhero flick for you.
Batman Ninja—the first theatrically released (in Japan at least), full-length anime film in the Dark Knight's repertoire—finally hit streaming and VOD services (Amazon, iTunes, Google Play) in the US this week. The new title from DC Animation and Warner Bros. comes available in Japanese with English subtitles or as a straightforward English-language anime. And while its combination of highly stylized art, over-the-top story, and anime's-greatest-hits touches won't be for everyone, those with an affection for at least part of that recipe will be extremely pleased with what they've ordered.
Read 10 remaining paragraphs | Comments


Auction Finds Combined For A Unique Desoldering Station
If you are in the market for a high-quality soldering iron, a rewarding pursuit can be attending dispersal auctions. It is not unusual to see boxes of irons, as anything remotely iron-like is bundled up together by the auctioneer into a lot with little consideration for what combination has been gathered. [Stynus] found himself in this position, the proud owner of a Weller DSX80 desoldering iron from an auction, but without its accompanying solder station required for it to work. Fortunately, he had another Weller solder station, not suitable for the DSX80 as it stood, but which provided a perfect platform for a home-made Weller DSX set-up.
The old station had a side-mounted valve and a 24V input, so he had to install a toroidal mains transformer and move the valve frontwards. Fortunately, this style of Weller station case was frequently available with just such a transformer installed, so there was plenty of space in the enclosure. A custom board was then created for a temperature controller centered upon a PIC microcontroller, and a new front panel was crafted to accommodate a Nokia 5110-style LCD display.
The resulting unit with its upper half repainted, is a pleasing and professional-looking project. Heated desoldering irons are an extremely useful tool that anyone should consider for their arsenal, but not all of them are as good as this Weller-based one. We recently reviewed a much cheaper example, with comedic results.
Open-source Circuit Simulation
For simple circuits, it’s easy enough to grab a breadboard and start putting it together. Breadboards make it easy to check your circuit for mistakes before soldering together a finished product. But if you have a more complicated circuit, or if you need to do response modeling or other math on your design before you start building, you’ll need circuit simulation software.
While it’s easy to get a trial version of something like OrCAD PSpice, this software doesn’t have all of the features available unless you’re willing to pony up some cash. Luckily, there’s a fully featured free and open source circuit simulation software called Qucs (Quite Universal Circuit Simulator), released under the GPL, that offers a decent alternative to other paid circuit simulators. Qucs runs its own software separate from SPICE since SPICE isn’t licensed for reuse.
Qucs has most of the components that you’ll need for professional-level circuit simulation as well as many different transistor models. For more details, the Qucs Wikipedia page lists all of the features available, as does the project’s FAQ page. If you’re new to the world of circuit simulation, we went over the basics of using SPICE in a recent Hack Chat.
Thanks to [Clovis] for the tip!
The Cake Robot is No Lie
[52 Skillz] didn’t know anything about building robots. So he decided to not just read about it or make a simple robot. He jumped right in and wanted to build a robot that could make a cake. It took about a year and a half but it now — mostly — works, as you can see in the video below.
Granted it isn’t perfect and it isn’t really all that practical. But as a learning exercise, it was certainly ambitious and successful. Apparently, you still have to scrape the bowl a little by hand to get some of the flour off the bowl walls. Also, loading the ingredients might be more work than just making it by hand, but that really isn’t the point.
As far as we can tell, there aren’t any specific plans provided to duplicate the robot. But we didn’t think that was such a bad thing. You wouldn’t be making one to actually produce cake. And if you just copy the existing design, you’ll miss out on the process of learning, which is described in detail in the video. If you do want to go down the same path, be warned that [52 Skillz] estimates he put in about 300 hours of effort.
However, it is fun to watch all the mechanisms employed to do the work. It is almost like a Rube Goldberg machine, but a little higher tech.
If we had a cake bot, we think it would only be fair to add electronics to the finished products. Then again, you could skip the cake and go to full virtual reality. Well. Perhaps not full, but certainly low calorie.
Saturday, April 28
Weekend Watch: Erin Kennedy’s Robot Mission
 RobotGrrl is a robot missionary, intent on helping to understand and improve the environment through robotics.
The post Weekend Watch: Erin Kennedy’s Robot Mission appeared first on Make: DIY Projects and Ideas for Makers.
An Open-Source Turbomolecular Pump Controller
It’s not every project write-up that opens with a sentence like “I had this TURBOVAC 50 turbomolecular pump laying around…”, but then again not every write-up comes from someone with a lab as stuffed full of goodies as that of [Niklas Fauth]. His pump had an expired controller board, so he’s created an open-source controller of his own centred upon an STM32. Intriguingly he mentions its potential use as “I want to do more stuff with sputtering and Ion implantation in the future“, as one does of course.
So given that probably not many Hackaday readers have a turbomolecular pump lying around but quite a few of you will find the subject interesting, what does this project do? Sadly it’s a little more mundane than the pump itself, since a turbomolecular pump is a highly specialised multi-stage turbine, this is a 3-phase motor controller with analogue speed feedback taken from the voltage across a couple of the motor phases. For this reason he makes the point that it’s a fork of his hoverboard motor controller software, the fruits of which we’ve shown you in the past. There isn’t a cut-out timer should the motor not reach full speed in a safe time, but he provides advice as to where to look in the code should that be necessary.
This is by no means the first turbomolecular pump to make it to these pages, in 2016 we brought you one taking inspiration from a Tesla turbine.
PCB Take on Stars, Moons, and Ringed Planets is Gold
Remember when PCBs were green and square? That’s the easy default, but most will agree that when you’re going to show off your boards instead of hiding them in a case, it’s worth extra effort to make them beautiful. We’re in a renaissance of circuit board design and the amount of effort being poured into great looking boards is incredible. The good news is that this project proves you don’t have to go nuts to achieve great results. This stars, moons, and planets badge looks superb using just two technical tricks: exposed (plated) copper and non-rectangular board outline.
 Don’t take that the wrong way, there’s still a lot of creativity that [Steve] over at Big Mess o’ Wires used to make it look this great. The key element here is that copper and solder mask placements have extremely fine pitch. After placing the LEDs and resistors there’s a lot of blank space which was filled with what you might see in the night sky through your telescope. What caught our eye about this badge is the fidelity of the ringed planet.
The white ink of silk screen is often spotty and jagged at the edges. But this copper with ENIG (gold) plating is crisp through the curves and with razor-sharp tolerance. It’s shown here taken under 10x magnification and still holds up. This is a trick to keep under your belt — if you have ground pours it’s easy to spice up the look of your boards just by adding negative-space art in the solder mask!
[Steve] mentions the board outline is technically not a circle but “a many-sided polygon” due to quirks of Eagle. You could have fooled us! We do like how he carried the circle’s edges through the bulk of the board using silk screen. If you’re looking for tips on board outline and using multiple layers of art in Eagle, [Brian Benchoff] published a fabulous How to do PCB art in Eagle article. Of course, he’s gone deeper than what the board houses offer by grabbing his own pad printing equipment and adding color to white solder mask.
The art was the jumping off point for featuring this badge, but [Steve] is known for his technical dives and this one is no different. He’s done a great job of recounting everything that popped up while designing the circuit, from LED color choice to coin cell internal resistance and PWM to low-power AVR tricks.
Homebrew Not a Hakko
We don’t know if [Marius Taciuc] was thinking about how all Jedi make their own lightsabers as a rite of passage, but he decided that it was time to build his own soldering iron. He used a Hakko T12 tip which has a built-in thermocouple. However, he found that the information on the Internet about the tips was either incomplete or incorrect. Naturally, he figured it out and you can see the completed iron in the video, below.
The problem stems from the thermocouple type. Some sites he found identified it as a type K device. Others said it wasn’t, but didn’t say what kind it was. He took a container of oil and heated it to various temperatures and then measured it with both a commercial soldering iron and the T12 tip. By plotting the data against known thermocouple curves, he concluded the device was actually type C.
The custom iron had a few design goals:
- Very small
- External power from 9 to 30V
- Small LCD display with backlight
- Rotary encoder menu
- T12 tips
- Monitor movement to manage standby temperature
- PCB temperature readings to shut down in case of overheating
- Audio warnings and alarms
- Statistics available on the screen
As you can see from the video below he made his goals and it looks like the iron works well. We’ve noticed a theme of taking high-end soldering iron components and pairing them with less expensive homebrew parts. This recent JBC build comes to mind. We’ve even seen other Hakko builds.
Umbrella and Tin Cans Turned into WiFi Dish Antenna
There’s something iconic about dish antennas. Chances are it’s the antenna that non-antenna people think about when they picture an antenna. And for many applications, the directionality and gain of a dish can really help reach out and touch someone. So if you’re looking to tap into a distant WiFi network, this umbrella-turned-dish antenna might be just the thing to build.
Stretching the limits of WiFi connections seems to be a focus of [andrew mcneil]’s builds, at least to judge by his YouTube channel. This portable, foldable dish is intended to increase the performance of one of his cantennas, a simple home-brew WiFi antenna that uses food cans as directional waveguides. The dish is built from the skeleton of an umbrella-style photographer’s flash reflector; he chose this over a discount-store rain umbrella because the reflector has an actual parabolic shape. The reflective material was stripped off and used as a template to cut new gores of metal window screen material. It’s considerably stiffer than the reflector fabric, but it stretches taut between the ribs and can still fold up, at least sort of. An arm was fashioned from dowels to position the cantenna feed-horn at the focus of the reflector; not much detail is given on the cantenna itself, but we assume it’s similar in design to cantennas we’ve featured before.
[andrew] hasn’t done rigorous testing yet, but a quick 360° scan from inside his shop showed dozens of WiFi signals, most with really good signals. We’ll be interested to see just how much this reflector increases the cantenna’s performance.
2018’s Hottest Accessory Is a 3D Printed Air Raid Siren
Some say the spectre of global nuclear annihilation is closer than ever before. What better time to head to the workshop to prepare for the coming apocalypse? [MrExpert] is here with the build you need – an air raid siren you can print at home.
It’s a simple build, which makes it fun and accessible for just about anyone with a 3D printer. Rotational power is provided by a brushless outrunner motor hooked up to an ESC, controlled with a servo tester. The rotor and frame for the parts are 3D printed, and held together with a handful of standard fasteners.
Initial testing proves that yes, it does work and generates a rather earsplitting tone. The second revision improves upon this somewhat. However, the key to getting that authentic sound is in the sweep of the tone. By replacing the servo tester with an Arduino or other micro that can generate smoothly sweeping pulses to ramp the rotational speed up and down, you’ll get much closer to that genuine the-sky-is-falling timbre.
It’s certainly not rocket science, and would make a great project to whip up with the kids on a rainy weekend. While you’re at it you can share the wisdom behind the duck and cover technique, but maybe save the geopolitical rants for when they’re a bit older. We’ve seen air raid siren builds before, too – like this sturdy wooden unit.
Friday, April 27
Tips of the Week: FaceTime Helpers, Opening a Box (DiResta-Style), Going for Read, Not Reality
 Here is your weekly dose of inspired tips from top makers.
The post Tips of the Week: FaceTime Helpers, Opening a Box (DiResta-Style), Going for Read, Not Reality appeared first on Make: DIY Projects and Ideas for Makers.
Thermoelectric Fan Harvests Wood Stove Heat Junkyard Style
Anyone who heats with a wood stove knows that the experience is completely different from typical central heating. It’s not for everyone, though, and it’s certainly not without its trade-offs. One of the chief complaints is getting heat away from the stove and into other areas of the house, and many owners turn on an electric fan to circulate the heated air.
That’s hardly in the green nature of wood heating, though, and fans can be noisy. So something like this heat-powered stove-top fan can come in handy. Such fans, which use Peltier devices to power a small electric motor, are readily available commercially. [bongodrummer] thought that sounded like no fun, though, and created his own mostly from junk. The Peltier module was salvaged from an old travel fridge and mounted to a heat sink from a computer to harvest heat from the stove. The other side of the Peltier needs to have a heat sink to keep it cooler than the hot side, and [bongodrummer] chose an unconventional bit of salvage for the job — the cylinder of a chainsaw engine. The spark plug hole sprouts the mount for the fan motor, and the cooling fins help keep the Peltier cool. And to prevent overheating of the device, he added a surprise — a car cooling system thermostat to physically lift the device off the stove when it gets too hot. Genius!
The video below shows the build, which was not trivial. But we think the end results are worth it, and it reminds us a little of the woodstove generator we featured a while back.
IR Detective Eases Development with Compact Decoding
Hardware development often involves working with things that can’t be directly perceived, which is one reason good development tools are so important. In appreciation of this, [David Johnson-Davies] created the IR Remote Control Detective to simplify working with IR signals. While IR remote controls are commonplace, there are a number of different protocols and encoding methods in use across different brands. The IR Detective takes care of all of that with three main components, none of which are particularly expensive. To use the decoder, one simply points an IR remote at the unit and presses one of the buttons. The IR Detective will identify the protocol, decode the signal, and display the address and command related to the key that was pressed. The unit doesn’t consist of much more than an ATtiny85 microcontroller, a small OLED display, and an IR receiver unit. The IR receiver used is intended for a 38 kHz carrier, but such receivers can and do respond to signals outside this frequency, although they do so at a reduced range.
As a result, not only is the unit useful for decoding IR or verifying that correct signals are being generated, but the small size and low cost means it could easily be used as a general purpose receiver to add IR remote control to other devices. It’s also halfway to bridging IR to something else, like this WiFi-IR bridge which not only interfaces to legacy hardware, but does it across WiFi to boot.
Circuit VR: Oscillating Bridges
Circuit VR is where we talk about a circuit and examine how it works in simulation with LT Spice. This time we are looking at a common low-frequency oscillator known as the Wien bridge oscillator.
What makes an oscillator oscillate? A circuit with amplification that gets the same amount of the output signal fed back into its input, in phase, will oscillate. This is the Barkhausen criterion. Here, we’re going to look into what makes an oscillator work in simulation, and gain some insight into what happens when there’s too much feedback and too little.
In particular, we’ll look at the Wien bridge oscillator, a very simple design that originated as a way to measure impedance back in 1891. Modern versions add some additional features, but let’s start with the most simple implementation and work our way up.
Basics
If you think about the Barkhausen criteria, it is obvious we are going to have an amplifier in the middle of our oscillator. That makes sense. Without amplification, the signal would eventually die away from loss. You can think of an oscillator as an amplifier that keeps re-amplifying its output at a certain frequency — sort of an electronic perpetual motion machine. Of course, the extra energy comes from the amplifier, so no physical laws are being broken, and as long as there’s external power it will run.
Our circuit will consist of an amplifier and a filter circuit. In contrast to some other oscillators which use inverting amplifiers, the Wien bridge uses a non-inverting amplifier. Inverting a signal is equivalent to adding a 180-degree phase shift, which means that the filter network needs to come up with an additional 180 degrees to match the input and output phases. With the Wien bridge, the amplifier is non-inverting, so we need a filter circuit with zero phase shift. Let’s see how that plays out.
Networking
 Consider this schematic (you can download
 wien-network.asc from GitHub). With Spice, notice that V1 is just a placeholder that tells the analysis code where to sweep the frequency. RL, of course, is just a load resistor and doesn’t affect the operation of the circuit.
R1 and C1 form a high pass filter. At low frequencies, C1 will tend to block signals. R2 and C2 form a low pass filter. At high frequencies, C2 will approach a short to ground. That means the combined network acts as a bandpass filter. The maximum signal will occur at the frequency when the reactance of C1 is the same as the value of R1. Since I used all the same values, that will be the same frequency where C2‘s reactance is the same as R2‘s value.
If the resistance and the reactance are equal at some frequency, it makes sense that the phase shift will be zero at the same frequency. You can pretty quickly calculate: 
However, we can do it easier by building our circuit in Spice and running an AC analysis on it:

The white line corresponds to zero degrees phase and the dotted blue line crosses it in the red circle. Note that also corresponds with the maximum signal transfer. The math and the plot show the zero-phase-shift frequency is around 3.4 kHz.
But note that the gain here is about -9.6 dB — the output signal is about 1/3 of the input. We’ll need to set the amplifier gain to about three to compensate for this. (Would you like a quick refresher on decibels?) With this filter topology, it turns out that no matter what values of R and C you use, the zero-phase-shift gain is always 1/3, and the amplifier gain will always need to be greater than three.
Wait, What?
It is all well and good to just read a number off a chart, but let’s quickly derive the filter gain. You can think of R1/C1 and R2/C2 as complex impedances. At the frequency we care about, we know that the reactance of C1 (and C2) will be 4.7 kΩ. The circuit becomes a voltage divider with R1/C1 as the “top” element and R2/C2 as the bottom. Let’s call those elements Z1 and Z2.
Z1 will equal the square root of the sum of R1 squared and C1‘s reactance squared, which is really just two times 4700 squared (remember C1‘s reactance is 4700 at resonance). So Z1 is about 6.6 kΩ.
Z2 is trickier because they are in parallel. There are several ways to think about it, but I like to take the reciprocal of 4700, square that, multiply by two and then take the square root. So Z2 is about 3.3 kΩ.
A voltage divider with 6.6 kΩ at the top and 3.3 kΩ at the bottom will work out to 3.3 / (6.6+3.3) = 3.3 / 9.9 = 1/3. If you are an algebra whiz, you can work this symbolically and find out that the answer is always 1/3 as long as resistance is positive.
Amplify
 Adding a 3X amplifier is easy. In reality, you need just a little bit more gain to overcome other losses in the circuit. (See
 wien-osc.asc from GitHub.)
The R1/C1/R2/C2 network is the same as before, but now there is an op amp set up as a non-inverting amplifier. The gain is set by R3 and R4. R3 should be about 50K and the gain is 1 + R4/R3 which would be 3. With the 49.9K value the gain is just a bit more. In practice, keep in mind that component tolerances and temperatures will affect values, too.

There are two things you have to be careful with to make this simulate correctly. First, you need a real op amp model that has noise so the oscillation will start. There are other ways to introduce noise, but using a practical op amp model usually does the trick.
The other thing is you need the “uic” option on the .tran simulation card. Without this, the analyzer figures out a steady initial state for the capacitors, and you won’t get oscillation. These sort of things are necessary because the simulator components are too perfect.
 That’s interesting to see the signal start off small and get a little bigger each time through the loop until it levels out just after 90 milliseconds. However, let’s zoom in after the oscillator has started up. Notice that the green trace (the + input of the op amp) is in phase and about 1/3 of the output signal in blue. Try it and select View | FFT on the plot pane’s menu to see the output at the desired frequency and some fairly low harmonics. Because there’s no automatic gain control (see below) there is some clipping, but it isn’t very severe, because in simulation it’s pretty easy to get the gain of the amplifier nearly exactly right.
What If?
The beauty of trying this in Spice is that it is very easy to adjust parameters and see what happens. Try changing R5 to exactly 50 kΩ. Then bump it up higher. Then go a little lower. You’ll see that too much amplification results in distortion. Too little will cause the signal to die down eventually.
Many practical designs use a nonlinear device of some kind to adjust the gain dynamically. The brilliant idea that made Hewlett-Packard’s first product, the HP200A back in 1939, was to use a lightbulb as the gain adjusting circuit: as the voltage in the circuit gets higher, it heats up and the resistance increases, reducing the gain. The schematic appears in the original patent. Another common configuration uses diodes to allow gain to be higher on startup but then reduce as the signal level rises.
Try changing C1 or C2 independently. Obviously, if you change them together — or change R1 and R2 together — you’ll just adjust the frequency.
What’s Next?
If you are up for a challenge, can you replace the op amp with a FET or a bipolar transistor? Just remember the amplifier has to be in phase and have a gain greater than or equal to three at the frequency of interest, and closer to three to avoid distortion.
Because op amps are typically gain limited at higher frequencies, you don’t see the Wien bridge used much at higher frequencies. But there are many other kinds of oscillators you can try simulating. However, nearly all of them will have this structure of an amplifier with some sort of feedback. The total feedback, including the amplifier, has to be in phase and the total gain around the loop has to be one. In a simulation, it is really that simple. In practice, though, there’s a lot of gotchas like parasitic capacitance, unwanted nonlinearities, and other concerns. However, the simulation can help clear up your understanding of how things work and make the practical realization of your design as painless as possible.