We have just concluded a successful Hackaday Superconference where a highlight for many was digging into this year’s hardware badge. Shaped in the general form of a Game Boy handheld gaming console, the heart of the badge is a large FPGA opening up new and exciting potential for badge hacking.
Beyond our normal tools of compiling custom code or modifying hardware with a soldering iron, we now have the option to change core hardware behavior with Verilog. And people explored this new frontier to great effect, as seen at the badge hacking ceremony. (Video embedded below.)
FPGAs are not new, technically speaking, why are they exciting now? We can thank their recent growth in capability, their rapidly falling cost, and the relatively new availability of open source toolchains. These developments elevated FPGA into one of the most exciting trends in hardware today, so this year’s badge master [Sprite_TM] built an open FPGA playground for several hundred of his closest Supercon friends. Let’s take a look at what people were able to accomplish in just a few days using this unique and powerful hardware.
Getting an Early Start: Custom Cartridges
Some of the fun started even before Supercon weekend. Badge development was done openly with a Hackaday.io project page and public Github repositories for hardware and software. Anyone who poked around would know what to expect. Like the fact each badge comes with a blank prototype cartridge featuring on board flash memory. Upon seeing the design for the cartridge, a few people like [Thomas Flummer] decided to build their own custom cartridges ahead of Supercon. We love seeing the enthusiasm for a piece of hardware they had not yet touched.
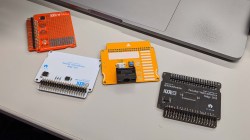
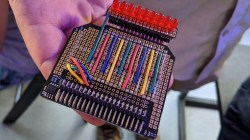
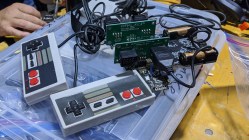
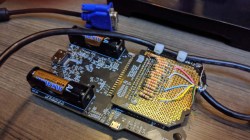
Others started with the canvas that was the blank cartridge. Everything from a LED array neatly laid out for charlieplexing, to [Ben Hencke] interfacing with Nintendo controllers for multiplayer gaming, to a VGA video output cable by [Ste Kulov], and many more.
Glorious Mono Sound
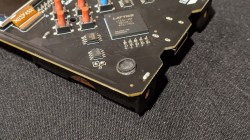
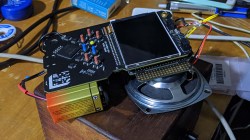
Alongside the blank cartridge, a modest little speaker was also distributed to be soldered to the audio amplifier chip and tacked in front of the badge. But word quickly spread that, if one is willing to temporarily unsolder one of the battery trays, it was possible to connect speaker wires from the back side of the badge. This simple and popular hack resulted in a tidy speaker installation. Others ignored the little speaker entirely and replaced them with larger units, some like [Emily Velasco] backed their big speakers with additional amplification.
They Blinded Me with Science LEDs and Wireless Comms
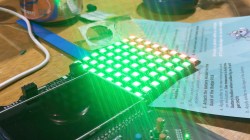
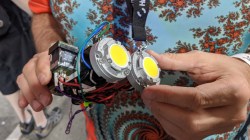
In full support of those who just want to blink an LED, the badge had several already on board and people could blink them from either C code or via Verilog. But the perf board made it easy to add more LEDs so we were in no shortage of badge lighting. From a colorful array by [Thomas Sarlandie] to a retina-destroying setup from [Garrett Mace].
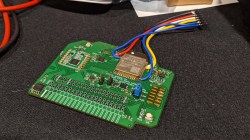
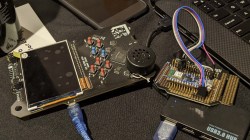
On the opposite of “blink a LED” is the [Celcyon] Odin shield team, which arrived blazing with breathtaking ambitions. Their custom shield hosted not just a ESP32-WROOM-32 but also a RFM69HCW sub-GHz wireless transceiver plus supporting hardware. All this in service of their goal of turning the badge into the FPV control console for a robot, complete with video feed displaying on screen.
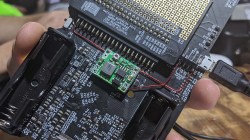
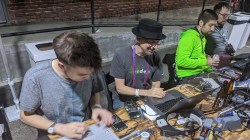
But people didn’t need to bring their own parts to have a hardware challenge on their hands. [Sprite_TM] had embedded one in the badge: The tiny onboard LEDs are actually RGB units, but unleashing their full color requires diving into schematics and Verilog. (The badge with the LED requiring reflow was an accidental master level challenge, kudos to [Ben] for making it work anyway.) [Ian Frosst] was one of several who dedicated time to solving the LED challenge. But after burning through many batteries, he made a quality-of-life hack adding a small buck converter module to run off USB power in a way that didn’t risk damaging the batteries (if present).
Truly a Choose Your Own Hardware Adventure Event
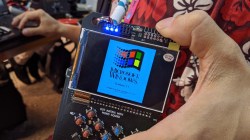
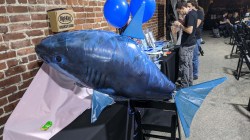
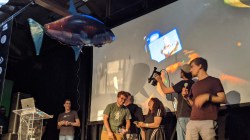
Even with the RGB challenge’s deliberate omissions, the badge offered plenty of power straight out of the box for those who prefer to stay in the software realm. We admire [Caroline] who didn’t know C programming coming into the weekend, but learned enough by the end to create a colorful palette animation demo. The gaming-inspired splash screen animations encouraged others to create splash screens from other domains. It was fun to see an old Windows startup screen on the badge.
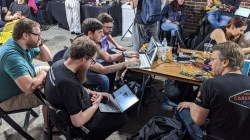
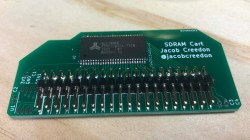
And finally, receiving the biggest applause was Linux-on-Badge: this team used all the badge hacking tricks in the book. The hardware component was a 32 MiB SDRAM cartridge by [Jacob Creedon]. The default badge SOC FPGA bitstream was entirely replaced in order to support a minimalist Linux. Much of the development was done on [Michael Welling]’s computer, guided by the precedence of a LiteX project putting Linux on the Radiona ULX3S. This is a true success story of Supercon collaboration as the team (including [Drew Fustini], [Tim Ansell], [Sean Cross], and many others) came together and worked late into nights, drawing from the massive body of collective expertise of the community.
What’s Next for These FPGA Badges?
The badge hacking ceremony may have wrapped up the weekend’s activity, but we expect it is not the end of the story. Many said they intend to continue playing with the badge after the conference, with projects ranging from 3D graphics rendering to precision motion control. It is a far more interesting piece of hardware than any FPGA manufacturer’s evaluation board, and we’d love it if project collaboration continued on our community chat channel. This badge is too good to be left gathering dust on a shelf!
No comments:
Post a Comment