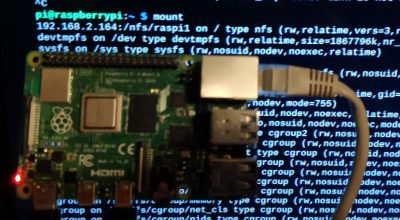
We’ve talked about PXE booting the Raspberry Pi 3B+, and then looked at the Raspberry Pi 4 as a desktop replacement. But there’s more! The Pi 4 sports a very useful new feature, the flashable bootloader. Just recently a beta version of that bootloader was released that supports PXE — booting up over the network — which has become a must-have for those of us who have had consistently bad experiences with root filesystems on SD cards.
 What are the downsides, I hear you ask? You might see slower speeds going across the network compared to a hi
gh quality SD card, particularly with the Pi 4 and its improved SD card slot. PXE does require an Ethernet cable; WiFi is not enough, so you have that restriction to contend with. And finally, this isn’t a portable option — you are tethered to that network cable while running, and tethered to your network to boot at all.
On the other hand, if you’re doing a permanent or semi-permanent install of a Pi, PXE is absolutely a winner. There are few things worse than dragging a ladder out to access a Pi that’s cooked its SD card, not to mention the possibility that you firewalled yourself out of it. Need to start over with a fresh Raspbian image? Easy, just rebuild it on the PXE server and reboot the Pi remotely.
Convinced PXE is for you? Let’s get started!
To boot a Raspberry Pi 4 using PXE, there are a few steps required, starting with updating that bootloader firmw
are. This means installing Raspbian to an SD card and booting the Pi off of it at least once. From there, we turn to the PXE server to build the remote filesystem and set up the NFS and dnsmasq services. This article draws from a pair of official Pi network boot guides.
Bootloader Update
At the time of writing, the eeprom firmware that supports PXE boot is still in beta. We have to grab that firmware, change the boot order configuration, and then flash it to the onboard chip. Once the Pi 4 is booted off your Raspbian SD card, we can do the following to get the firmware updated:
sudo apt-get update
sudo apt-get upgrade
wget https://github.com/raspberrypi/rpi-eeprom/raw/master/firmware/beta/pieeprom-2019-10-16.bin
rpi-eeprom-config pieeprom-2019-10-16.bin > bootconf.txt
sed -i s/0x1/0x21/g bootconf.txt
rpi-eeprom-config --out pieeprom-2019-10-16-netboot.bin --config bootconf.txt pieeprom-2019-10-16.bin
sudo rpi-eeprom-update -d -f ./pieeprom-2019-10-16-netboot.bin
cat /proc/cpuinfo
That last command should output some information on the Pi itself. We’re interested in the entry for the Pi’s serial nu
mber. Take note of the last 8 characters of that code, as we’ll use it later. In my case, it is “0c4c21e5”. That’s all the setup needed for the Pi itself.
Building the Filesystem
Last time we set up a PXE server, we used Centos and a dedicated network. This time, let’s use Debian, and see if we can get PXE working on an existing home network. These instructions should apply for a Raspbian server as well.
The following simply builds the Pi’s filesystem as an NFS share. The Raspbian image we’re using does need two files manually updated, which is why we’re deleting and re-downloading start4.elf and fixup4.dat
sudo apt-get install unzip kpartx dnsmasq nfs-kernel-server
sudo mkdir -p /nfs/raspi1
wget https://downloads.raspberrypi.org/raspbian_latest
unzip raspbian_latest
sudo kpartx -a -v 2019-09-26-raspbian-buster.img
mkdir rootmnt
mkdir bootmnt
sudo mount /dev/mapper/loop0p2 rootmnt/
sudo mount /dev/mapper/loop0p1 bootmnt/
sudo cp -a rootmnt/* /nfs/raspi1/
sudo cp -a bootmnt/* /nfs/raspi1/boot/
cd /nfs/raspi1/boot
sudo rm start4.elf
sudo rm fixup4.dat
sudo wget https://github.com/Hexxeh/rpi-firmware/raw/master/start4.elf
sudo wget https://github.com/Hexxeh/rpi-firmware/raw/master/fixup4.dat
Remember that serial number from earlier? Here’s where it comes into play. The first place a Pi attempts to PXE boot from is a folder named the last 8 characters of that serial number. You’ll want to replace each “0c4c21e5” below with the serial number you found earlier. We’re also using a bind mount so the /boot folder is accessible as part of the tftp service, as well as being mounted as part of the NFS share. The advantage here is that the kernel and rest of the boot code can be updated using apt.
sudo mkdir -p /tftpboot/0c4c21e5
echo "/nfs/raspi1/boot /tftpboot/0c4c21e5 none defaults,bind 0 0" | sudo tee -a /etc/fstab
sudo mount /tftpboot/0c4c21e5
sudo chmod 777 /tftpboot
We’ll create a file in the boot folder to enable SSH, modify the Pi’s fstab so it won’t look for filesystems on the SD card, and finally replace the boot command in cmdline.txt. Be sure to replace nfsroot IP address with the IP of the Debian machine serving as the PXE server.
sudo touch /nfs/raspi1/boot/ssh
sudo sed -i /UUID/d /nfs/raspi1/etc/fstab
echo "console=serial0,115200 console=tty root=/dev/nfs nfsroot=192.168.2.209:/nfs/raspi1,vers=3 rw ip=dhcp rootwait elevator=deadline" | sudo tee /nfs/raspi1/boot/cmdline.txt
Configuring Services
Setting up the NFS share is as easy as adding a line to /etc/exports and starting the services. Do note that we’re not setting up a particularly secure NFS service. This isn’t a problem on a home network where you trust all the computers, but don’t run this setup exposed to the public internet.
echo "/nfs/raspi1 *(rw,sync,no_subtree_check,no_root_squash)" | sudo tee -a /etc/exports
sudo systemctl enable rpcbind
sudo systemctl enable nfs-kernel-server
sudo systemctl restart rpcbind
sudo systemctl restart nfs-kernel-server
We need to add our settings to the dnsmasq config file, which is where most of the magic happens. Let’s talk about that “proxy” setting. What we’re asking dnsmasq to do is watch for DHCP requests, and rather than respond to those requests directly, wait for the primary DHCP server to assign an IP address. If dnsmasq sees a request for PXE information, it will send additional information to inform the PXE-capable device of the PXE server information. The upside is that this approach lets us support PXE booting without modifying the primary DHCP server.
You will need to adjust the dhcp-range setting to match your network. Usually it can be set to the broadcast address of your network, which can be identified using ip addr, looking at the brd entry.
echo 'dhcp-range=192.168.2.255,proxy' | sudo tee -a /etc/dnsmasq.conf
echo 'log-dhcp' | sudo tee -a /etc/dnsmasq.conf
echo 'enable-tftp' | sudo tee -a /etc/dnsmasq.conf
echo 'tftp-root=/tftpboot' | sudo tee -a /etc/dnsmasq.conf
echo 'pxe-service=0,"Raspberry Pi Boot"' | sudo tee -a /etc/dnsmasq.conf
Success!

The final step is to start dnsmasq and watch the log for connections.
sudo systemctl enable dnsmasq
sudo systemctl restart dnsmasq
sudo tail -f /var/log/daemon.log
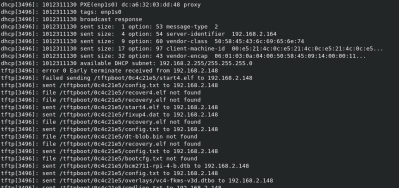
At this point, you can take the Pi 4 we configured, remove the SD card, and attempt booting it over PXE. You should be able to see the tftp requests for boot files in the log, and finally an NFS mount request. Congratulations, we’ve made it work!
No comments:
Post a Comment