Macros are meant to make our lives easier, but they live up to this promise with mixed results. Generally speaking, a macro is a special combination of keys on the keyboard that execute a custom task — their goal is to speed up your productivity by getting away from mousing through menus. But once a macro requires more than two keys, they can get a bit cumbersome to input. I have personally found that repeated use of macros that require ctrl+shift can potentially cause problems. I don’t know about you (and your repetitive stress mileage may vary), but personal injury is the polar opposite of what I want from something that’s supposed to be convenient.
The more I thought about how nice it would be to have a field of dedicated one-punch macro keys, the more incomplete my life seemed without it. Every uncomfortable three-key shortcut I chorded was more motivational than the last.
I love keyboard shortcuts, and not just because I prefer keyboard navigation in general. A lot of little things about writing for the web can be streamlined with shortcuts, like writing html tags and doing image manipulation. And I’m always looking for a better workflow to pin down my fleeting mental fragments, at least until that dark day that I can turn on Dropbox Thoughts and burn my brainwaves directly to disk.
Why a Foot Stool?

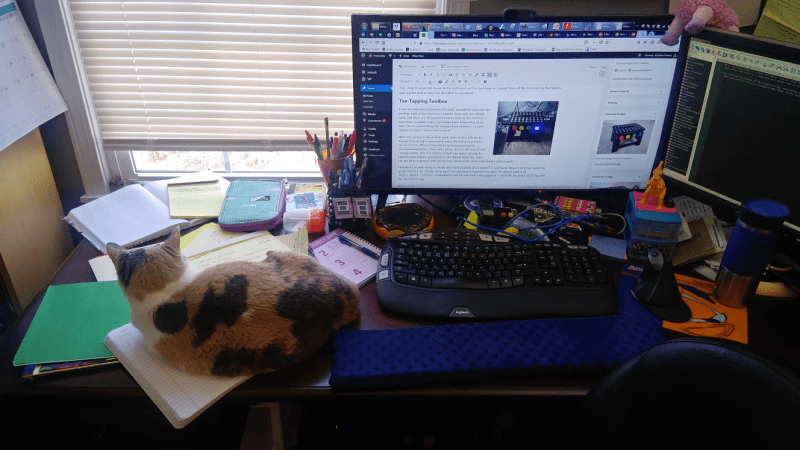
Most macro machines resemble keyboards and live on the desk surface. My desk surface is covered in loose papers, legal pads, folders, and felines, and I don’t want to worry about keeping another input device uncovered. Also, the cat and I don’t need another permanent fixture taking up valuable space. I was already using a footstool anyway because my desk is weirdly tall, and I have to raise the chair pretty high to sit comfortably at it and type.
One of the reasons I had for making a foot-fed keyboard specifically is to improve my focus. I wanted a way to have shortcuts that wouldn’t take my fingers away from the act of creating with words. The more shortcuts I have, the more time I can spend in the zone, perfecting my pun game. Most of the shortcuts are for post-making minutiae. For instance, see that subheading that begins the next section? It’s a specialized <h2> tag that plays nicely with images.
Once I managed to get it memorized, I got tired of typing them out, only to have WordPress convert them on the sly to a plain <h2> tags once in a while. I also have a shortcut that spits out an <a href> tag. Both of them use a for loop to move the cursor to the right spot, so I can just keep on typing. None of the shortcuts by themselves save a great deal of time, but the effect is cumulative.
 Toe-Tapping Toolbox
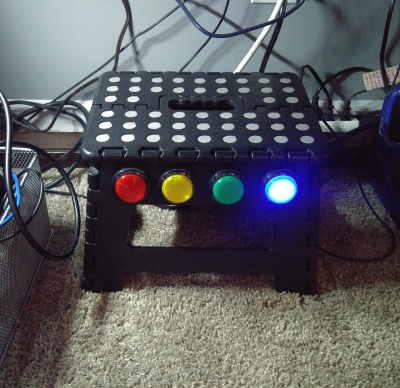
Physically there are only four buttons on the stool, but there is a “bank” system that expands the stool it to 20 potential macros. Each button gets a new macro based on which of the buttons is illuminated — or the default where no button is lit — for a total of five banks. At the moment, I have more available macro real estate than I know what to do with. This is a good thing, like having empty drawers in a parts cabinet. It means I have room to grow.
When the stool is in the default bank, none of the LEDs are lit, though they do light momentarily when the button is pushed. I can access the different color banks by long-pressing the corresponding button. Once that’s done, the LED will stay lit until I change banks. One nice feature is that I can switch directly to another bank without going back to the default bank first. And I can get back to the default bank just by long-pressing the active color bank’s button again.
I wrestled a bit with trying to decide what kind of shortcuts to deposit in each bank. Would I be better served to group shortcuts by context, or by type? For now, they’re organized by type. The default bank is all ctrl+shift+letter combinations, and the red bank is all snippets — stuff like the fancy <h2> tag and the <a href> tag.
 How It’s Made
I’ll be honest – I wanted this to be easy. The sooner I got this keystool under my feet, the sooner I could stamp out lost seconds and shortcut fatigue.
The brains of the operation is an ItsyBitsy M0, programmed in CircuitPython. It’s a huge help that the board already presents as an HID, and coding is as easy as editing a text file on a mass storage device. Sure, it feels good to program in Arduino or C or on bare metal, but the point of this was to boost productivity.
As soon as I think of a new shortcut I’d like to have at my toes, all I have to do is switch my text editor to main.py, write a new method, call the method in the appropriate bank, and save the file. Programmatically speaking, it’s quite a portable device.
 Micro Macro Foot Stool
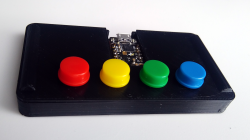
Within the first day of using the foot stool, I was hooked. But it only had the default bank and a grand total of four slots at that point. I wanted to keep improving on it, but I didn’t want to mess it up with my experimentation or stop using it in the meantime. I had no choice but to build a second, smaller version.
The only functional differences are that the micro macro foot stool uses a Trinket M0 instead of an ItsyBitsy M0, and there are no LEDs, so I can’t test changes to those.
A Learning Experience
I learned a few things making this stool, which is the mark of any good project. For one, I’d never drilled such huge holes before, or done much drilling in plastic. Now I can go forth and confidently drill any decently rigid plastic without fear. Enclosure-wise, the folding stool turned out to be quite hackable, because it comes apart easily and lays flat for drilling. Makes me wonder what else could be done to these stools.
Another perk was the chance to get down in the grass with CircuitPython. I hadn’t done a whole lot with it before this project, but it has snaked its way into my heart. I’m grateful to live in a time where a project like this can have such a low barrier to entry. Whether you want to build something like this to prevent repetitive stress injury or for better noob pwnage, CircuitPython makes it easy.
I don’t wear shoes here in the Hackaday home office, but if I did, you can bet I would try using stompbox switches.
No comments:
Post a Comment