Back in the early 1980s, hotshot business types on the go would have used what were referred to at the time as portable computers from companies like Osborne or Kaypro. Due to the technical limitations of the era these so-called “luggables” were only slightly smaller and lighter than contemporary desktop computers, but they had integrated displays and keyboards so they were a bit easier to move around. A few years later the first generation of laptops would hit the market, and the portables predictably fell out of favor. Today they’re relatively rare collectors items; a largely forgotten first step in the steady march towards true mobile computing.
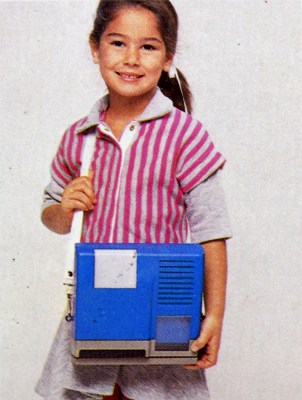 Which makes the 1984 edition of VTech’s “Whiz Kid” educational computer an especially unique specimen. The company’s later entries into the series of popular electronic toys would adopt (with some variations) the standard laptop form factor, but this version has the distinction of being what might be the most authentic luggable computer ever made for children. When this toy was being designed it would have been a reflection of the cutting edge in computer technology, but today, it’s a fascinating reminder that the latest-and-greatest doesn’t always stick around for very long.
The classic luggable hallmarks are all here. The flip down keyboard, the small and strangely offset display, there’s even lugs on the side to attach an included strap so the youngster can sling it over their shoulder. On the other hand, the fact that it’s just a toy allowed for some advantages over the real thing: it can actually run on battery power, and is quite lightweight relative to its size.
When we last took a peek inside one of VTech’s offerings, we found a surprisingly powerful Z80 machine that was more than deserving of its PreComputer moniker. But that BASIC-compatible design hailed from the late 80s, and was specifically marketed as a trainer for the next generation of computer owners. Will the 1984 Whiz Kid prove to have a similar relationship to its adult counterparts, or does the resemblance only go skin deep? Let’s find out.
Form Over Function
When I saw that the Whiz Kid included a shoulder strap, I naturally expected it to be pretty heavy. But without the four C batteries installed (only 80s kids will remember every toy using C cells), it actually weighs less than a kilogram. Holding it in your hands, it almost feels like the bulky plastic enclosure is hollow. Which, it turns out, isn’t far from the truth.
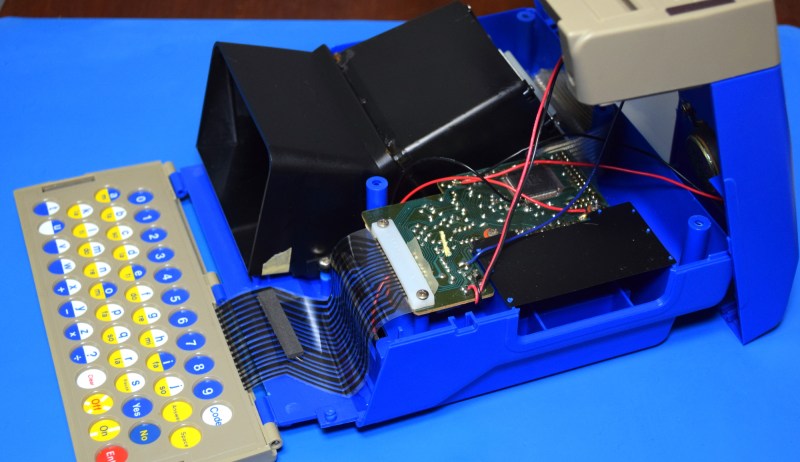
Opened up, we can see just how little is actually inside the Whiz Kid. Beyond the black LCD projector assembly, which we’ll come back to in a minute, the only thing in the bottom half of the shell is the relatively small PCB. With all the empty space inside, it seems like the case dimensions weren’t really a matter of necessity. More likely VTech had specific external dimensions, or at least proportions, in mind when designing the Whiz Kid to really drive home the luggable look.
Ye Old Single Chip
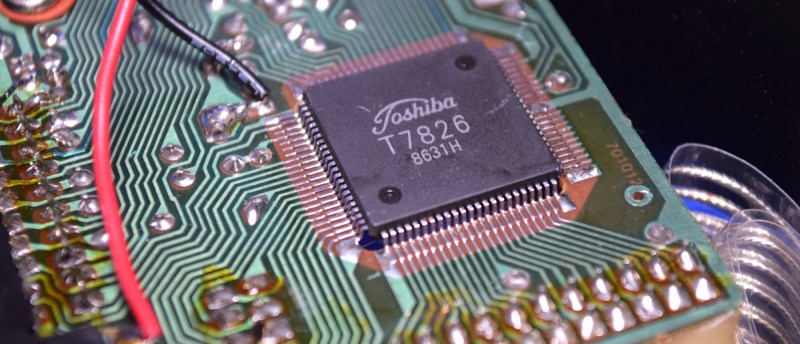
Anyone who’s taken apart a piece of electronics from the 1980s knows they’re generally swimming with integrated circuits. Which of course should come as no surprise, as the rapidly falling cost of ICs is what gave rise to all sorts of weird and wonderful electronic devices that would have been prohibitively expensive previously. But in this case, there’s only one obvious chip on the PCB: a QFP-92 device from Toshiba.
Marked T7826, I’ve unfortunately not been able to find any information about this particular device. But we can see from the traces that it’s responsible for everything inside the Whiz Kid, as the chip’s pins are directly connected to the LCD, cartridge connector, and keyboard. Today we’d call this device a microcontroller, but back then the terminology was a bit different. Of course, this is just one side of the PCB. Surely we’ll see some support ICs when we flip it over.
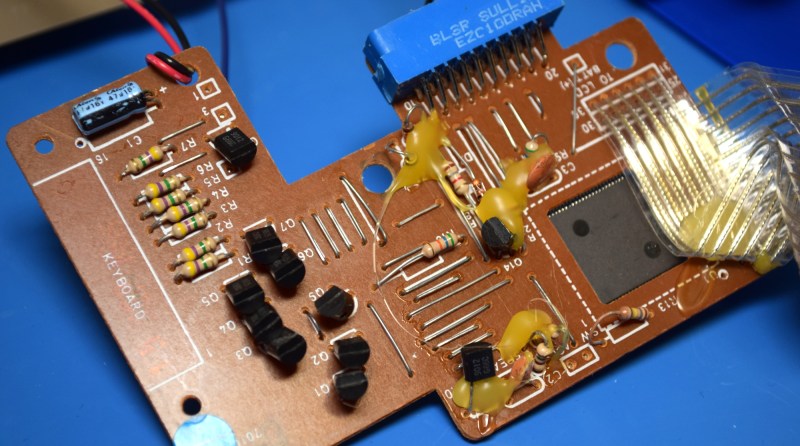
Or not. The reverse side of the board is remarkably free of…well, just about anything. There’s plenty of the metal jumpers that were so common on the single-sided PCBs of mass produced gadgets of the era, but outside of that, there’s only a smattering of simple components. As there’s actually no physical power switch on the Whiz Kid some of those transistors are presumably part of a soft power system, and the bulk of the resistors appear to be connected to the keyboard matrix.
These days, a single chip that handles nearly every function of the device is fairly common in mass produced electronics. You’ve certainly seen them. A nearly bare PCB with a big black epoxy blob in the middle has been a depressingly common sight over the last couple of decades. But even today, you’d still expect to see a separate chip for storing the device’s firmware and other data. This thing is supposed to be a computer, so where are all the games and programs being held?
It’s All in the Cards
Since there’s no external ROM, and the expansion cartridges are optional, then all of the software must be stored inside that single chip. That wouldn’t be a problem today when even $3 microcontrollers include several megabytes of onboard storage, but doing it in 1984 would be quite a trick indeed. So how did they pack in all the lines of text and images?
Well, the short answer is that they didn’t. Not in the way you’re probably expecting, anyway. The Whiz Kid borrows a trick that was common in computer games of the era: making extensive use of printed material to compensate for limited digital storage capacity. In this case, the “games” take the form of paper cards which are inserted into the front of the system. The back of each card explains what the user is supposed to do, and the front (which can be viewed through a clear plastic window) has the appropriate images printed on it. Most of the cards task the user with guessing, and correctly spelling, words that are somehow related to the artwork.
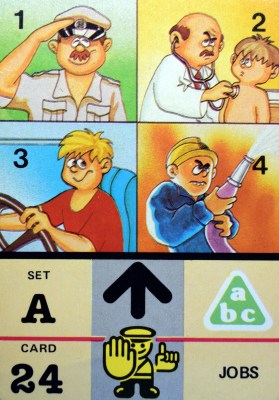
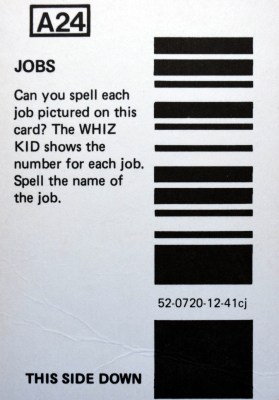
The back of each card features a linear barcode, which is picked up by an infrared reader mounted under the tray. It would appear the codes store some sort of lookup information (presumably related to the string of characters printed within the code) that tells the Whiz Kid which of the pre-loaded words the user is supposed to be spelling. With creative use of the instructions and imagery on the cards, VTech was able to create many different games and activities that ultimately revolve around the list of words the Whiz Kid has stored internally.
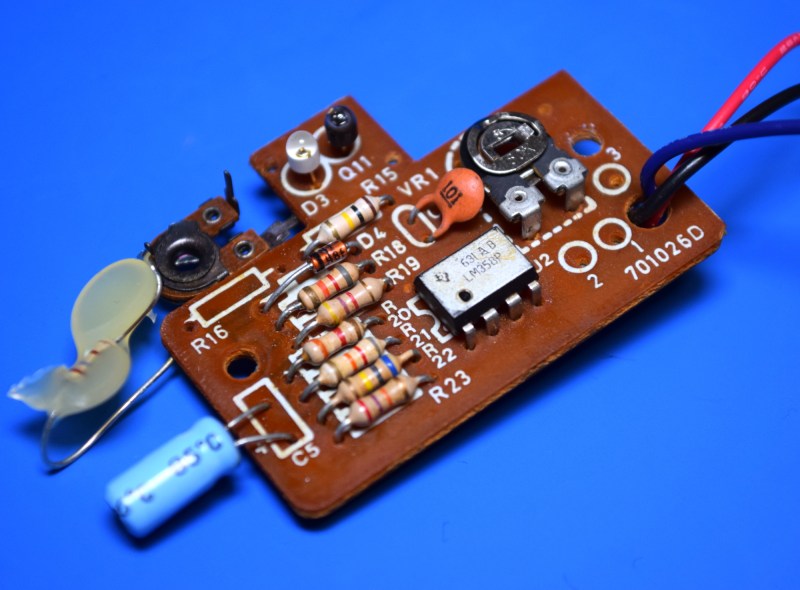
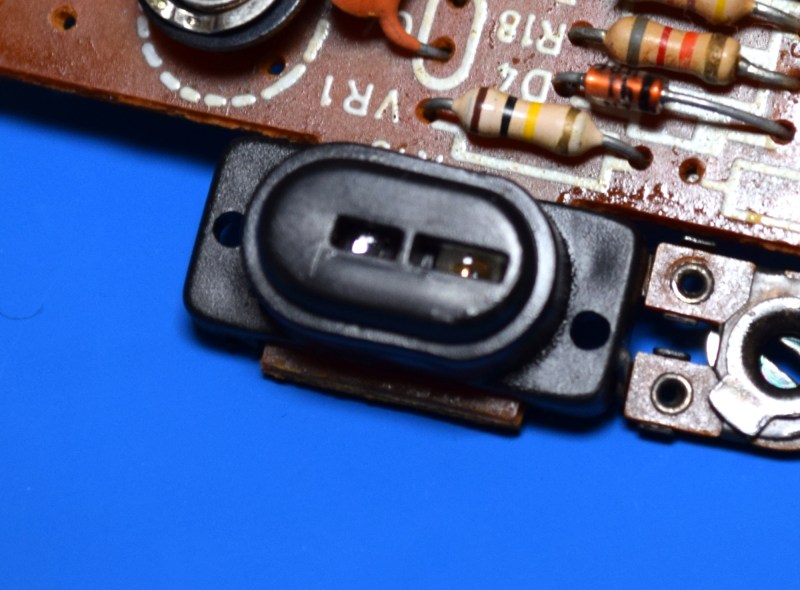
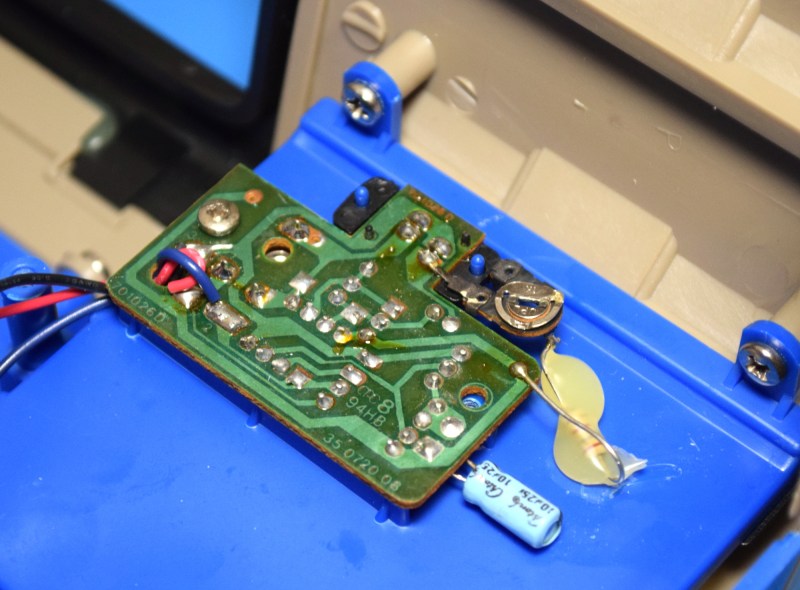
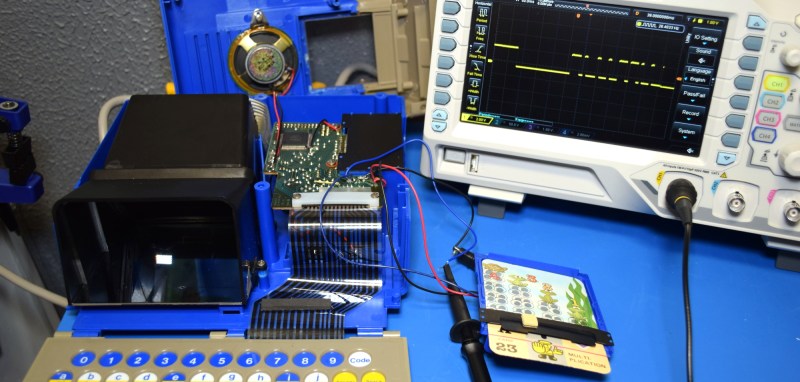
The reader itself is quite simple, and is not unlike what you might find in an old mouse. An IR LED and detector are placed into a housing so that that the alternating white and black stripes passing in front of them will produce a voltage change in the detector. This is fed into an LM358 op-amp to create a clean square wave the microcontroller on the main PCB can easily read. There’s only three wires between the main board and the reader, which makes it easy to hook the oscilloscope onto the data line and see this exchange happen in real-time.
I didn’t attempt to decode the signal, so feel free to chime in for extra credit in the comments. But from the looks of it, the code holds at least a few bytes worth of data. Certainly enough to hold two hex characters, and as there’s only 50 cards in a pack, that would offer more than enough possible combinations to use as a unique ID.
Tick Tock, You’re the Clock
 At this point, the particularly astute reader might notice something’s not quite right with this concept. If pushing the card through the reader creates a square wave that corresponds to the data on the barcode, wouldn’t the speed at which the card is inserted be of critical importance? Surely the young operator couldn’t be expected to push the card in at the perfect speed each and every time they wanted to change cards?
Well it turns out VTech must have had a lot of faith in the kids of 1984, because that’s exactly what you have to do. Getting the cards to reliably decode is perhaps one of the most frustrating user experiences I’ve ever had, and it’s difficult to remember a time as a child when I would have been so bored that fighting this machine would have been preferable to literally kicking rocks.
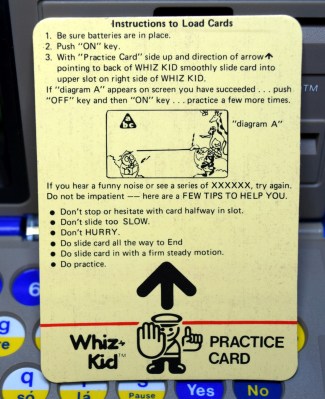
The inclusion of a “Practice Card” makes me think at least somebody at VTech had misgivings about this particular method of data entry. The user is instructed to use this card as a way to hone their insertion technique until it essentially becomes muscle memory.
There’s no special trick, and the tips given on the card aren’t anything you wouldn’t have figured out yourself eventually. I can only imagine how little comfort the tip “Do Practice” would have had for a frustrated six year old on Christmas morning in 1984.
Gaming on the Big Screen
Going back to the idea that the visual look of this device was clearly very important to VTech, they obviously needed a screen that would be in proportion with the rest of the case. A row of little dinky LED characters wouldn’t do, and obviously a real CRT was out of the question. So they came up with a rear-projection LCD that, given the limitations of the time, isn’t half bad.
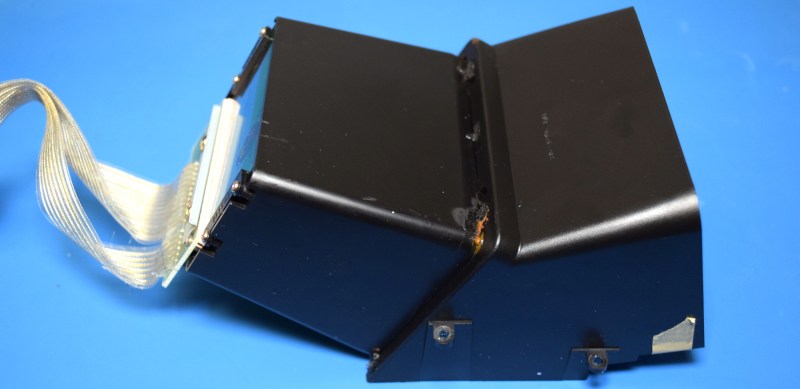
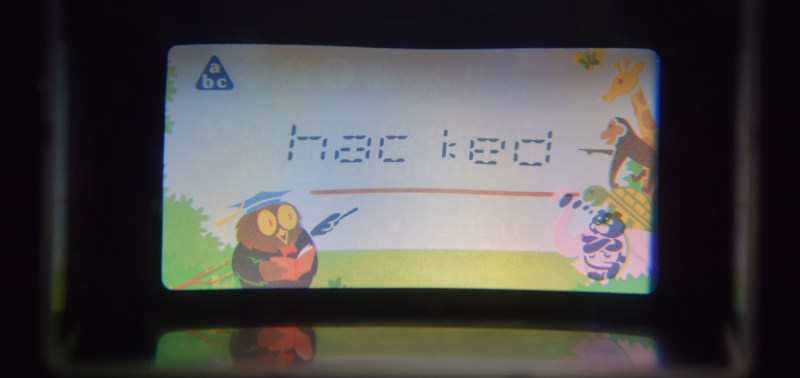
The idea here is that light coming through an opaque window in the back of the Whiz Kid passes through an LCD panel not unlike what you’d find in Nintendo’s Game & Watch handhelds. This projected image is then bounced off of a real glass mirror mounted in the bottom of the chamber which the viewer is looking down on.
From the viewer’s perspective, you see a nice bright image with an apparent size that is larger than the physical LCD panel. Thanks to some tinted filters, it even appears in color. Well, at least the parts that don’t move anyway.
The downside is that you need a lot of light coming in through that back panel. The addition of an onboard light wouldn’t have been much of a technical challenge, but was probably deemed pointless since you still need to read the cards and see the pictures on them to actually play any of the games.
Hack Without Apologies
The way I figure it, there’s a good chance you’ve read this far because you’re wondering if you can use the carcass of a Whiz Kid as the base for a Raspberry Pi luggable. Well you definitely can, though there are a few things to keep in mind that might not be obvious from looking at these pictures.
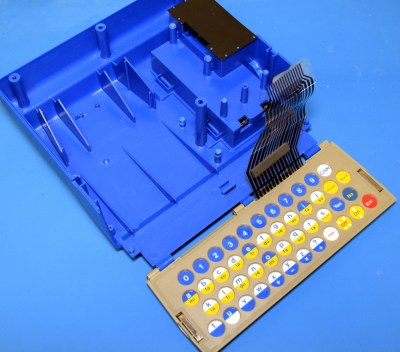 For one, it’s probably smaller than you think. Remember, this is a device that was designed for grade-school children to use. For reference the keyboard is roughly 200 x 70 millimeters (7.87 x 2.75 inches), and depending on how creative you get with the mounting, you’ve only got about 120 mm (4.72 inches) diagonally to put a screen in. Doable, but pretty cramped for any serious use.
Of course, once you had a keyboard and real LCD mounted on the front of it, the internal dimensions are absolutely cavernous. You’d have no problem fitting in whatever you wanted, up to and including x86 single board computers like the Atomic Pi.
At the end of the teardown for the VTech PreComputer 1000, I noted the machine seemed to have enough historical significance that gutting it shouldn’t be taken lightly. But frankly, the 1984 Whiz Kid doesn’t hold that same kind of importance or charm. Its oddball internals don’t appear worthy of preservation, and the infuriating card reader gimmick makes operating the toy an absolute chore for the modern user.
VTech’s goal was to make the outside of the Whiz Kid look as much like a real portable computer was possible, and didn’t give nearly as much thought to the electronics inside. So why should you?
No comments:
Post a Comment