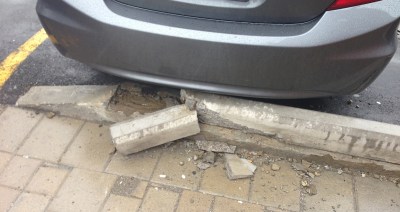
From the looks of the average driveway or sidewalk, it may seem as though concrete is just destined to crack. But if concrete is so prone to cracking, how are we able to use it in so many high-stress applications like bridges and skyscrapers? This question came about while I was researching 3D-printed thermite for an article. Thermite is often used in welding railroad tracks, and I linked a video of fresh tracks being welded that had concrete ties. I knew I had to find out how concrete could be made to withstand the pressure of freight trains.
On its own, concrete is brittle and has no give to it at all. But that doesn’t mean it isn’t strong. Although concrete has good compression strength, the tensile strength is quite poor. Around the late 1800s, someone thought to fortify spans of concrete with steel reinforcing bars, better known as rebar. Steel can stretch, adding steel bars gives the concrete some tensile strength to go along with its compressive strength. Rebar also allows for thinner slabs and other members.
Rebar Only Goes So Far

Rebar or mesh-enforced concrete is good for things like parking lot blocks and roads, but it still fails before it ought to. In fact, it usually has to crack before the rebar can chip in any of its tensile strength.
In high-stress concrete applications like bridges and skyscrapers, it’s terrifically important to avoid deflection — that’s when a concrete member flexes and bends under load. Deflection can cause the modern glass skins to pop off of skyscrapers, among other problems.
A solid, rigid bridge is much nicer to walk, drive, and bicycle on than a bridge that sways in the breeze. But how do you do make a rigid bridge? One solution is to apply stresses to the concrete before it ever bears the load of cars and trucks or a steady schedule of freight trains.
Pre-stressed concrete is like rebar-enforced concrete, but with the added power of tension baked in. By adding stress to the concrete before it goes into service, deflection will be reduced or perhaps eliminated altogether. With the addition of tensile strength, more of the concrete’s own strength is able to come into play.

Tensioning Methods
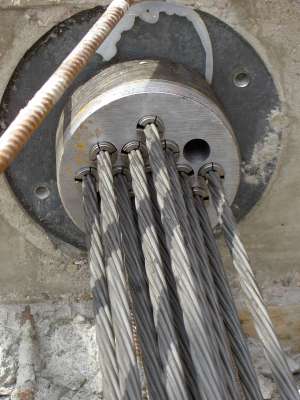
Pre-stressed concrete is made by running tendons throughout a concrete member or adjacent to it, and then pulling the tendons taut from the anchorage points to add tension. These tendons are usually made of either high-tension steel, carbon fiber, or aramid fiber, which is used in anti-ballistic fabrics. They are arranged in either a monostrand or multi-strand configuration and act a bit like rubber bands.
The result of pre-stressing concrete is that future compressive forces will make the service member act like super concrete, and future tensile forces will make it act more like high-tension steel. In other words, pre-stressed concrete can stand up to pressure and even twisting much better than regular concrete. It is essentially programmable because it is pre-stressed in a calculated way that mimics the stresses it will bear once it’s in service.
The ‘pre’ in pre-stressing means that it happens before the concrete member goes into service. The tensioning itself can either be done before the concrete is poured, or after it has set. There are various reasons for using one method or the other, but they’re pretty equal in terms of results.

Pre-tensioning: Before the Pour
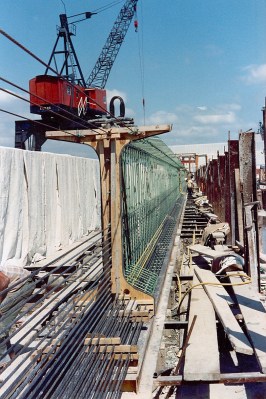
This is the oldest method of pre-stressing concrete, and it dates back to the late 1800s. Pre-tensioning is typically used in making beams, floor slabs, balconies, water tanks, and concrete pipes. Before the concrete is poured, the tendons are secured between end-anchorages whether the tendons will end up within the concrete or directly next to it.
As the concrete cures, it sticks to the tendons, and the tension from the tendons is transferred to the cured concrete. After they’re unbolted, the rods stay tensioned, held in place by the concrete. Pre-tensioning is often done in advance of a construction project and the completed pieces are shipped to the site. This way, multiples can be made at once in a large mold called a casting bed. These are set up with tendons that are several members long, and then cut down once the concrete has cured.
Post-tensioning
As you might imagine, post-tensioning is done after the concrete cures. In post-tensioning, the tendons are inside of sleeves made of plastic or galvanized steel, and the concrete is cast with the sleeves on. After the concrete is cast, the tendons are pulled taut by the anchorages just as they are in pre-tensioning.
There are two ways to do post-tensioning — bonded and un-bonded. In bonded post-tensioning, grout is applied to the tendon sheathing before tensioning, and this permanently attaches them to the concrete. This does three things: it protects against corrosion, it locks in the tendon before tensioning takes place, and it improves structural behaviors of the concrete once the member is out there doing its job. In un-bonded post-tensioning, the tendons are in a lithium grease-filled sheath and are thus allowed to move longitudinally within the concrete. These are usually prepared off-site and in advance.
Check out the the concrete experiment in the video below. The concrete members that were pre-tensioned and post-tensioned are both able to withstand twice as much force as the member with traditional rebar. It isn’t that tensioned concrete is magically stronger, just that it’s allowed to reach more of its strength potential. Be sure to stick around after the experiment for a dramatic look at the process of manufacturing concrete railroad ties.
No comments:
Post a Comment